Brushs Laser Cutting and 3d Printing workbench

3 LINK

Western Thunderer
I noticed the pulse effect too. Not sure what was going on there. Its impossible to see with the naked eye. I shall investigate.

Hi Phil, yes I have also got these pock marks in the mortar courses, I didn’t notice them until I sprayed on the first coat of primer. I use a synthetic filler for the mortar courses so hopefully the marks will be covered up.

Martyn.
 

BrushType4

Western Thunderer
I’ll come back to the concrete hut later but while celebrating New Year’s Eve on the sofa I started to CAD up another commission. This time for a 4mm scale GWR Goods Shed based on South Brent. It’s quite a nice size actually.

So progress so far on the sides. I’ll sort the end walls up today.

A299A71E-F9D5-42F4-8254-5CB839E8B4DA.jpeg
 

Pencarrow

Western Thunderer
Hi Phil, couple of questions for you...

Will the Brent GS be available to others or is it a single commission? If generally available will it be just 7mm or also 4mm?? I'm asking on behalf of someone who could well be interested in a 4mm version.
 

BrushType4

Western Thunderer
Hi Phil, couple of questions for you...

Will the Brent GS be available to others or is it a single commission? If generally available will it be just 7mm or also 4mm?? I'm asking on behalf of someone who could well be interested in a 4mm version.
Hi though this is a commission, it will be available as a kit and fully finished once it’s finished as I’m trying to build up my 4mm range. A 7mm version may come along later. Talking 4mm, I’ve several signal boxes and engine sheds coming through too.
 

BrushType4

Western Thunderer
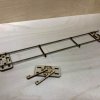
For a number of years now, I’ve used laser cut chairs and sleepers when function was more important than form, for example in my engine shed pit roads where access is difficult and no one wants glued chairs loosening in places difficult to fix. A conversation today reminded me that I’d toyed with using this method to reduce costs of laying track in fiddle yards and anywhere else where function takes priority over form such as tunnels etc. So dusting off an old drawing and laser cutting out, we have pregauged sleeper and chair system. A slight addition is that an intermediate combined chair sleeper not shown is added at 100mm centres instead of all screw down sections.
5748F0DD-F024-4AA4-9800-70EBF05D988E.jpeg136082430_10157640080132256_7510162213878440609_n.jpg

It’s at least 20% cheaper than c&l track and a massive time saver in scale 7.
 
Last edited:

BrushType4

Western Thunderer
A monster 7mm warehouse back scene coming off the laser this afternoon. Needs the sills and windows cut tomorrow morning then it will be posted. These big lasered boards do give me pleasure making. Not sure the painting is something I’d look forward too but it will look fantastic once it’s done.
0920B984-AE8D-4CB5-9C02-F3F62FA7EFC9.jpeg
 

Lancastrian

Western Thunderer
For a number of years now, I’ve used laser cut chairs and sleepers when function was more important than form, for example in my engine shed pit roads where access is difficult and no one wants glued chairs loosening in places difficult to fix. A conversation today reminded me that I’d toyed with using this method to reduce costs of laying track in fiddle yards and anywhere else where function takes priority over form such as tunnels etc. So dusting off an old drawing and laser cutting out, we have pregauged sleeper and chair system. A slight addition is that an intermediate combined chair sleeper not shown is added at 100mm centres instead of all screw down sections.
View attachment 135759View attachment 135785

It’s at least 20% cheaper than c&l track and a massive time saver in scale 7.

Just placed an order for these. I'll need to find a suitable board now to do some track laying on :D

Ian
 

BrushType4

Western Thunderer
Well the warehouse and several parcels sorted I had a chance to to do a trial of a panel of the 4mm scale GWR Goods Shed.

Parts laid out.
B2D9E8B2-C2B1-4DEE-BDC4-5DA7F95CC905.jpeg B4EAFAFE-DC9A-4682-AA2C-A099AA60A36E.jpeg

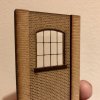
seven layers make up the wall making it almost prototypical thickness.
7EF89A7E-5EA7-4070-8E35-60BA601DDB02.jpeg


So we have this. I stuffed up some of the detail bricks so will add those tomorrow.
3233C31B-041F-4965-8307-E32437A82B0E.jpeg DB1C4232-658A-4964-91D0-5D7FAC91711B.jpeg
D5ADFA78-4B6C-49D3-A2BE-4B89FB943678.jpeg

A few tweaks needed but pretty pleased how it’s coming along. I regret not doing more 4mm building before.
 

Scale7JB

Western Thunderer
For a number of years now, I’ve used laser cut chairs and sleepers when function was more important than form, for example in my engine shed pit roads where access is difficult and no one wants glued chairs loosening in places difficult to fix. A conversation today reminded me that I’d toyed with using this method to reduce costs of laying track in fiddle yards and anywhere else where function takes priority over form such as tunnels etc. So dusting off an old drawing and laser cutting out, we have pregauged sleeper and chair system. A slight addition is that an intermediate combined chair sleeper not shown is added at 100mm centres instead of all screw down sections.
View attachment 135759View attachment 135785

It’s at least 20% cheaper than c&l track and a massive time saver in scale 7.

Brilliant idea!

JB.
 

michael mott

Western Thunderer
Hi Phil Just sent an inquiry to the website about making 6 of these panels
IMG_0907x1024.jpg
DSCN1183x1024.jpg
The postage will probably be a killer anyway I have looked into getting a local company involved but they are way way too expensive, I am in Western Canada. The last images of your western shed convinced me to ask the question.

Michael
 

BrushType4

Western Thunderer
On Martyns @3 LINK Church Norton thread he is building a one of my Signal Box kits and rather well too. Martyn used filler instead of paint to fill the mortar courses and I just so happened to have the same brand of filler in my decorating stash. I've tried to use filler before but I found it was a waste of time as the filler I was using was too rough and destroyed the painted work. So not wanting to destroy a building and wanting to do a useful experiment I made up one of my cameo pieces and painted that up. The painting of the brickwork has been well documented before and I won't bore you with all that, but needless to say, the actual painting was about 10minutes work, waiting around for the paint to dry, I left overnight.

This evening, the paint work nice and dry I tired Martyns method. I rubbed the filler in small amounts with my finger tip and worked into all the mortar line and wipe off with same finger until is was all done. I used a scalpel to just clean off the excess and for the couple of minutes work it took I was impressed. So here is my result. No weathering, just paint and mortar.

Station Cameo.jpg

Looks like the station has been earmarked for closure. The Ticket office door windows have been boarded up already.

I'll do a bigger piece this weekend, and try colouring the filler first.
 
Last edited:

BrushType4

Western Thunderer
Pretty excited today as the first batch of clamshell packaging and printing have finally come together and I can start packing my kits up for retail. I couldn’t have done it without the help from various WT’ers and Cynric for putting me on the path 9 odd years ago.

7D75493D-0071-4BCA-9484-DFA4BCBE0A76.jpeg

I've over 200 SKU's to get packaged up into the new retail format in the next few months. Hopefully in a modelshop near you soon.
 

BrushType4

Western Thunderer
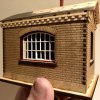
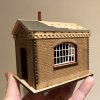
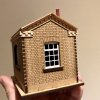
A while ago I found some pictures on Paul Bartlett’s fantastic site of a nice little Midland style weighbridge hut and coal office. Search

I purchased the photos I needed and Paul was really helpful so I urge anyone who uses his site for reference to buy pictures as the quality is superb.

So fast forward, a commission has come up that is Cement works based and it reminded me that I needed to complete this kit.

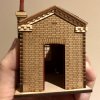
My test build today has thrown up some gremlins but thought I’d share what we have so far.

A342481E-F3B5-4F3D-B9DE-8A36BB8D3C7A.jpeg 793CF02E-9979-4902-BFB4-D3F624B71704.jpeg AD063C79-7E35-4D2B-9E80-A2171144C8AE.jpeg C2028C34-8A09-4950-81A3-6D26BE20116E.jpeg 17B8B1F4-5771-4CE8-99CD-B5C8138675CB.jpeg 8894B894-DBFD-4F31-98BA-7FC0634B4EC6.jpeg 8B5886FA-0D43-44E7-9992-5819966AEDBC.jpeg
 
Last edited:

BrushType4

Western Thunderer
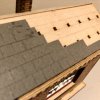
I just thought I’d explain this. When laying slates, the first row or layer that I think quite a few people miss, should be laid perpendicular. On the prototype this makes for a stronger edge and on both model and prototype gives an even look to the slates. The slates I supply include this row as a strip to make it easier to fix to the roof. I also when I remember, engrave lines to line the slates up but it’s not a big job to use rule and pencil, just remember the overlap should be at least 50%

99A154DC-528E-44BB-B2DC-D8A1D1C49C00.jpeg
 

Overseer

Western Thunderer
The bottom course is important to make a slate roof weatherproof, there was usually a tilting fillet to raise the bottom course slate to the same angle as the full slates on the roof slope. The lap would nearly always be around 3" so less than half each slate is visible. For example, the most common Welsh slate size was 20" x 10" and they would usually be laid to a gauge of 8 1/2" meaning that the battens were at 8 1/2" centres and the margin (the exposed part of the slate) would be 8 1/2" as well.
 
Top