You are using an out of date browser. It may not display this or other websites correctly.
You should upgrade or use an alternative browser.
You should upgrade or use an alternative browser.
Brushs Laser Cutting and 3d Printing workbench
- Thread starter BrushType4
- Start date
BrushType4
Western Thunderer
Eastsidepilot
Western Thunderer
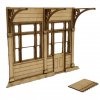
I might put an extra layer on for the window sills.
Phil,
Yes, I reckon the sills would be proud of the frame moulding http://www.westernthunder.co.uk/threads/architectural-modelling-details.9378/page-2
#39
Col.
BrushType4
Western Thunderer
Eastsidepilot
Western Thunderer
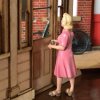
Nothing like a blonde getting hold of yer knob Phil 
Col.

Col.

Dan Randall
Western Thunderer
She could have just walked around....


Regards
Dan


Regards
Dan
Lancastrian
Western Thunderer
Your spelling is terrible.....it's Buffalo Grill !Obviously, she’s not a Buffalo Girl.
Cue blonde jokes...

Ian
BrushType4
Western Thunderer
BrushType4
Western Thunderer
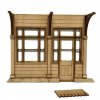
However good the laser is, sometimes its better to use the right process for the application. So while I can cut fine details like 4mm windows, for strength and easier painting I've decide to etch the windows for a 4mm GWR Goods Shed commission I am working on.
0.4mm NS etch.

The 'letter box' under the windows is for the window sill and makes sure the windows are correctly aligned with the outer layers.

0.4mm NS etch.
The 'letter box' under the windows is for the window sill and makes sure the windows are correctly aligned with the outer layers.

BrushType4
Western Thunderer
BrushType4
Western Thunderer
SouthernFan Ian
Western Thunderer
Somehow, the word impressive does not suffice.
Regards,
Ian
Regards,
Ian
BrushType4
Western Thunderer
LarryG
Western Thunderer
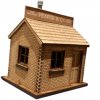
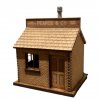
Yup. I want one please in 4mm. Have you a price for the 4mm small Barmouth signalbox?I'm always being asked if I could convert one of my most popular 7mm kits, the coal office in to 4mm. I've finally gotten around to it as someone waved some money my way
The little test build today.
BrushType4
Western Thunderer
Yup. I want one please in 4mm. Have you a price for the 4mm small Barmouth signalbox?
Here are the details Larry.
Signal Box
3d printing
BrushType4
Western Thunderer
I got a 3d printer sometime ago and recently I got it out of the box..
Having a little dabble in 3d software, I've settled with onshape. Its free, its full featured and its easy to use. So ticking all my boxes I've started designing odd bits. Gutting, Finials, fencing , door handles. Already I've a few bits and some of these will be available to buy via my website and some items are listed on Modelu3d as well.
I find tutorials a bit hard to stick with and find I learn best when I'm interested in what I'm trying to do. So in that tradition, I wanted to get to grips with the software, and I found a turntable drawing that had some interesting features that would keep me interested.
I chose the wheel first.

I had all the key dimensions and nothing was left for me to guess. So I drew the above drawing flat in my favourite 2d cad package Qcad. I really recommend this to anyone starting out in CAD. Its cheap (free) and fully featured and easy to use.
Once I had my DXF file drawn to full size. I imported this to onshape. Simply using the extrude tools, I made this in about five minutes.

Feeling that it was going in the right direction, I did the whole assembley for this section of the turntable.

So this represents about 30-45 minutes work at my novice level so I'm sure those of you who are expert can knock up this sort of thing much faster.
I've exported to a 3d printable file and I'll print these wheels out this evening.
Having a little dabble in 3d software, I've settled with onshape. Its free, its full featured and its easy to use. So ticking all my boxes I've started designing odd bits. Gutting, Finials, fencing , door handles. Already I've a few bits and some of these will be available to buy via my website and some items are listed on Modelu3d as well.
I find tutorials a bit hard to stick with and find I learn best when I'm interested in what I'm trying to do. So in that tradition, I wanted to get to grips with the software, and I found a turntable drawing that had some interesting features that would keep me interested.
I chose the wheel first.

I had all the key dimensions and nothing was left for me to guess. So I drew the above drawing flat in my favourite 2d cad package Qcad. I really recommend this to anyone starting out in CAD. Its cheap (free) and fully featured and easy to use.
Once I had my DXF file drawn to full size. I imported this to onshape. Simply using the extrude tools, I made this in about five minutes.

Feeling that it was going in the right direction, I did the whole assembley for this section of the turntable.

So this represents about 30-45 minutes work at my novice level so I'm sure those of you who are expert can knock up this sort of thing much faster.
I've exported to a 3d printable file and I'll print these wheels out this evening.
Last edited:
Tim Humphreys ex Mudhen
Western Thunderer
From the drawing a dead eye appears to be a bearing for the axle, probably lubricated with oil/grease. Dead eye because its only open on one side?
Looks just like the fixture that attaches the wheel to my wheelbarrow.
Tim
Looks just like the fixture that attaches the wheel to my wheelbarrow.
Tim

