Brushs Laser Cutting and 3d Printing workbench

Pencarrow

Western Thunderer
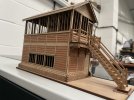
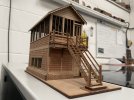
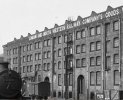
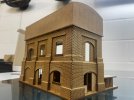
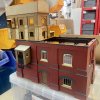
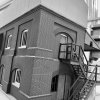
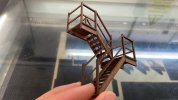
There seems to some debate elsewhere as to the authenticity of the model and the type of cladding portrayed.

So a side by side view here. Have we captured this as well as could be expected in a model or have we got it wrong?
View attachment 183488View attachment 183489

All looks spot on to me, particularly the cladding and roof beams. The only variance I can see, after looking at the photos for a while, regards the diagonal bracing and associated horizontal stiffener beam.

In the top photo the diagonals join the columns below floor level and in the model they join above floor level. I also wonder if the real top joint is slightly further down the column too but the photo isn't that clear. Overall this/these different joint locations have the effect of lowering the relative position of the point where the diagonals cross, and the horizontal is also therefore lower.

The civil engineer in me also notes that the diagonals and horizontal in the model are solid box section whereas they should be L section. Obviously a compromise given it's a laser cut kit, and a hardly noticeable variance which gives the builder opportunity to further enhance the kit with plastic or brass L section should they wish.

Other than those minor points I can't see anything for the armchair pundits to moan about, an absolutely excellent rendition of a workaday subject.
 
Last edited:

BrushType4

Western Thunderer
All looks spot on to me, particularly the cladding and roof beams. The only variance I can see, after looking at the photos for a while, regards the diagonal bracing and associated horizontal stiffener beam.

In the top photo the diagonals join the columns below floor level and in the model they join above floor level. I also wonder if the real top joint is slightly further down the column too but the photo isn't that clear. Overall this/these different joint locations have the effect of lowering the relative position of the point where the diagonals cross, and the horizontal is also therefore lower.

The civil engineer in me also notes that the diagonals and horizontal in the model are solid box section whereas they should be L section. Obviously a compromise given it's a laser cut kit, and a hardly noticeable variance which gives the builder opportunity to further enhance the kit with plastic or brass L section should they wish.

Other than those minor points I can't see anything for the armchair pundits to moan about, an absolutely excellent rendition of a workaday subject.

Yes, good spot. The truth is that section is incorrectly fitted. It’s the wrong way around so the plate is on the front when it should be at the rear. Also the cross has been glued at the wrong angle so in effect lifting the horizontal higher than it should be.
 

BrushType4

Western Thunderer
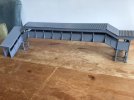
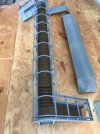
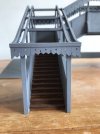
Back to the footbridge. The customer wanted to finish the painting so asked if I could supply in primer.

So a careful blast of good ole Halfords primer and we’re done. The roof is corrugated card and was slightly made wet and clamped in a lasercut jig until dry. It worked out well. 70D78D18-6F25-4804-92EE-35014473A2D7.jpeg6BF9FBDB-BCEC-443E-9953-41870A5C279A.jpeg36849090-A680-4793-AB4D-C5896A619D0A.jpeg
 
Last edited:
Rolling Road

BrushType4

Western Thunderer
A preview here of a project we've been working on. Not a building kit this time, not even a kit as this is supplied fully built.

Our Rolling road. This one is scale7 but all scales will be available.

The prototype will be at the Scale7 show on Saturday 29th if you want to come and see. There will be some great layouts and a scale7 and finescale test track.

Anyway back the rolling road.

Cradle for stand alone running.
FC5293A3-752A-4666-AA7D-DDFB1C1351C0.jpeg

Straddle. These will fit over most track but look awesome when paired with the cradle for stand alone running.
CF80FEAB-3B23-42BE-BFE0-90EFAD6F2980.jpeg

Pricing to be confirmed but I’d welcome any offers of interest so I can gauge how much material to buy in. We’ve a little for a handful currently in stock.

982F1C28-37CE-4721-ABCC-CE2C6FD9FA69.jpeg
 
Last edited:
simond

Western Thunderer
Phil,

I have a set of similar (32mm gauge) ones purchased many years back. I have found it useful to have a couple of lengths of raised track to support bogies, ponies and tenders at the same height as the drivers when running complete locos, rather than just the driving axles.

Might be an extra string to the bow?
 

BrushType4

Western Thunderer
It’s been ages since I’ve posted anything or managed to logon on Western Thunder. Lots of good stuff to catch up on.

Not much new stuff as just been busy completing outstanding work.

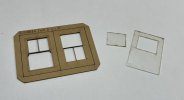
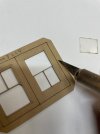
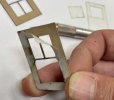
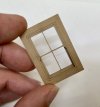
We do have a range of easy build doors and windows. These are parts from our kits that are now available separately for your own scratch building.

647977EC-C2B0-4F51-89D2-88F9D44CC860.jpeg
We’ve made these a bit easier to build by adding double sided tape to the process.

Spray paint while in the fret and then cut the tabs out.
C24D4FCD-2CD5-4B68-83FC-C0AC4FCC983E.jpeg

Peel off the sticky backing.
6A86FD40-8AFE-4A1C-AA34-A8804FB3EA4A.jpeg

Line up carefully. The tape is strong so you’ve only one chance to line up square.
DFA75D19-C0EA-4D42-AD12-6DB2418AA29E.jpeg
Drop the glazing in and the tape holds everything together. No glue anywhere near the glazing.

Let me know if you need any bespoke windows or doors doing.
 

BrushType4

Western Thunderer
I had a box of bits laying around for one of our Coal Stages. This is one of our earliest kits and it has been updated over time so the bits were obsolete but less than a kit. I still couldn’t just throw away so after sorting out what we had and realising we had just short of a full kit we got rid of the chaff and lasered up between jobs the missing parts.

Bit of Halfords primer, some suitable acrylics and wood stain we have a coal stage.
IMG_3732.jpegIMG_3731.jpeg
B5A11EC2-05FA-4FEF-A2C1-AB4E8E459CFC.jpeg
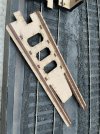
Particularly happy with the stairs. Still a work of art all these years later. :)

Will do more on it when time permits. Graham punched out the rivet detail on the tank while watching Netflix. 2.5hours to punch them all!
 
Last edited:

BrushType4

Western Thunderer
We’ve been asked to shrink another kit down to 4mm.

IMG_3734.jpeg

Our Engine Shed kit based on Thaxted that perfectly complements our Water Tower kit that we’ve already shrunk.

Graham will paint this up while he has the paints out for the coal stage and another build I’ll show next week.
 

BrushType4

Western Thunderer
Another kit that’s getting the 4mm treatment is the coal stage. Its an overdue commission that had stalled due to the number of layers that all needed to be reworked for the smaller scale.

IMG_3756.jpeg

Didn’t fancy making rivets with a machine at 4mm and especially as it takes hours to do, so I tried something different to get this detail.
IMG_3761.jpeg

Once paint is on it should be all good.

IMG_3758.jpeg
 
Last edited:
BrushType4

Western Thunderer
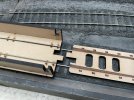
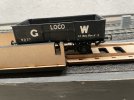
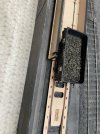
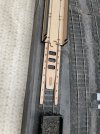
I’ve been making fiddle yard cassettes for a while and they were only envisaged to be a time saver for DIY versions we maybe have all attempted at some point in our railway modelling life. Anyway customers have been using these cassettes as off layout rolling stock storage and even putting them in a carry case to transport. So need as arisen for a method to use the cassettes on any layout without the intended adapter.

Drum roll… I’ve come up with the cassette railer docker and it works surprising well.

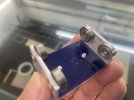
Bottom side that locates the CRD centrally using the rail chairs as a guide.

IMG_3778.jpegIMG_3776.jpeg


Our standard cassette on the rails ready to accept the docker.
IMG_3777.jpegIMG_3775.jpegIMG_3774.jpegIMG_3773.jpeg
 
Last edited:

Top