7mm On Heather's workbench - a trio of JLTRT Mk2s

Heather Kay

Western Thunderer
I admire your tenacity and application to the task in hand very much Heather

If a job's worth doing, as they say. :oops:

I set myself targets. I don't always hit them, but I'm getting closer to the standards I admire in others. It's all part of the process of learning and growing.
 

Heather Kay

Western Thunderer
Not much happened yesterday. Sadly, the lurgi struck once more, and I was simply too tired to do anything more constructive than drink tea and slump in front of the gogglebox.

Today, I have just applied a second coat of satin varnish to the sides. Hopefully that'll smooth over the slightly spotty finish from the first coat. :rolleyes:

Once that has dried and hardened, I'll get the glazing started. I am pondering the best way to replicate the frosted toilet windows. Prototype photos aren't clear whether the finish is frosted like the Mk1s or a translucent white. If it is the latter, I can leave one of the protective backing layers on the laser-cut glazing, which will save some time. (The Mk1 moulded glazing can be frosted by rubbing with wet'n'dry, which gives a pleasing effect.) I feel a little further armchair modelling will sort this out.

While I'm waiting for the volatiles to evaporate, I shall finished the paintwork on the ends - mainly detailing the gangway doors prior to fitting the actual gangway bits.

All being well, the sub-assemblies should enter the erecting shop tomorrow. :thumbs:
 

Heather Kay

Western Thunderer
Okay, I admit I am now disappointed. I'll explain in a minute.

First, trimming out the "precut" windows. The material itself was slightly bowed, whether through storage or simply being flexible I can't tell. Both sides are protected by a removable film, one side is white, the other transparent. I've decided, after research, to retain the white side on the inner faces of the toilet windows, as it best matches the available visual evidence of the real thing.

IMG_4991.jpg

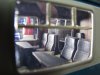
Here are all the windows for one SO, still with their protective sheets in place.

IMG_4992.jpg

Here's one side of an SO ready for windows to be fitted. I kept the protective films on as long as possible in order to prevent greasy fingermarks, scratches and so on. I've laid the side on some kitchen paper towel (an important part of my modelling toolbox, I have to say) to protect the paint finish from inadvertent marks from the tatty cutting mat.

So, why am I disappointed? Well, I invested in the JLTRT recommended cyano adhesive to fix these windows in. The stuff is thick. I was expecting thin so it would run into the frame and hold the glazing. I got stringy bits from the end of the cocktail stick, which were attracted to the shiny bits of glazing exactly where I didn't want it, aided by static from removing the protective film. :rant: The stuff takes for ever to set. When you think it's gone off, and you pick up the side to check things look okay, the window falls out. :headbang:

This is not what I expected at all. Perhaps I am doing something wrong.

On previous models for Richard, which have all been Mk1s, I have used Micro Kristal Klear to fix the glazing in. It's not perfect, essentially being PVA, and if you're not careful it is very easy to inadvertently push a panel into the coach. I bought the recommended cyano stuff because it doesn't bloom or frost. That's the only thing I can say for it.

I am now considering my options. I have five remaining sides to fit with glazing, and I'm seriously tempted to revert to the Kristal Klear. At least you can clean it off the visible surfaces after fitting. Tomorrow I shall be calling Laurie and requesting a fresh set of glazing to replace that which has been horlicksed.
 

Ressaldar

Western Thunderer
Hi Heather,

stick (pun not inteneded - much anyway) to the Kristal Klear much more user friendly and as you say it can be cleaned off very well - I use Testor's Acrylic cleaner.

cheers

Mike
 

Heather Kay

Western Thunderer
Mike, I think I will.

The "super" glue did actually go off in the end. Perhaps I was being too hasty, expecting a claimed 10-20 seconds for it to grab to actually mean 10-20 seconds in the real world.

Having reviewed the disaster area, the worst of the splodginess will end up within the stick-on ventilator area, so I may just about get away with it. Not ideal, though.

I have a pair of white cotton gloves I use when scanning negative films. I think I will be doing a Michael Jackson to avoid finger marks on the remaining glazing. ;)
 

Heather Kay

Western Thunderer
A morning update, for a change. I was so engrossed in fitting the glazing to the SO last night, I got completely carried away.

IMG_4993.jpg

This coach is the one finished in the "faded blue". The JLTRT method of creating the ventilators is hit and miss. Pre-cut plastic, in this case not quite cut through and requiring careful attention with a sharp blade before it will part, makes for a slightly variable finish. The upper side had the glazing fitted with the nasty superglue, the lower side with Kristal Klear. The vents are attached with double-sided tape.

IMG_4997.jpg

As you can see, the finish of the vents can leave something to be desired. I do my best, but the width of the laser cut does seem to vary, oddly, and the scalpel won't always follow the required line. They are then the very devil to tidy up. (The "scratches" are on the cutting mat, leftover marks from the lining process!)

IMG_4999.jpg

I've picked out the top of the door droplights in aluminium, though in this case and angle you can see the top edge of the glazing material as well. The toilet window frosting is the white protective film left in place on the glazing material. If you look closely in real life you will see tiny air bubbles, but they don't really show that much. You can just make out the grab rail behind the window - something surprisingly not in the kit ;). You can also see how poorly the ventilators fit can be - which reminds me I need to fabricate the proper centre vent doodad. Another NQLTRT effort. :rolleyes:

I'll crack on with the remaining SO and BSO glazing today, not forgetting the various handles and so on. The temptation to actually complete the "faded" coach is very strong, though.

Must. Resist. Temptation.:confused::cool:
 

Heather Kay

Western Thunderer
why? it will be the incentive (if needed) to finish off thewhole job:thumbs::thumbs:
:thumbs:

Because I've been trying to keep all three in parallel production, aside from advancing one underframe to completion early on for evaluation purposes. It's made it easier to keep up with all the little odds and ends.

Ah, what the heck. I'll finish up the coach. I'm fed up with a load of sub-assemblies littering the place. :thumbs:
 

Heather Kay

Western Thunderer
Just rolled out of the erecting shop into the viewfinder of the unofficial photographer.

IMG_5003.jpg

IMG_5001.jpg

IMG_5006.jpg

There are still some details for QC to sort out, like those fragile body end steps, getting the ETH cable and a few other small bits and bobs painted, and working out the best way to fix the gangway springing units (which are happy to droop into view right now). Which way up are they supposed to be, anyway?

It was fun fishing for the roof nuts with the bolt, blind through a hole in the floor. As I traditionally never glue roofs in place, in case Richard wishes to populate the coaches at some point (and to let pushed-in glazing panels be retrieved!), I resorted to popping the roof up over the toilet windows until I could see the nut!

The first one. Another SO and the BSO to complete. Perhaps this time tomorrow ... ? :thumbs::drool:
 

Heather Kay

Western Thunderer
Thanks Ross!

Some more shots, just to appease Mr B. ;)

IMG_5008.jpg

Passenger communication flag, which will be picked out in signal red. A good view of the toilet overflow pipe up on the roof, too. Look at that dust!

IMG_5009.jpg

The flag again. Cruel, cruel close-up.

IMG_5017.jpg

Passenger's eye view along the gangway from the adjoining coach to the toilet. The plate on the floor covers the coupling fixing nut hole in the floor.

IMG_5010.jpg

Passenger's eye view through the door into the vestibule. I have considered the internal door grab handle, which was a large plated thing that ran diagonally across the inside of the doors. It would probably be visible under close inspection, so I think I'll have to fit them after all.

IMG_5007.jpg

Finally, the rather comfy-looking passenger compartment.
 

Attachments

  • IMG_5007.jpg
    IMG_5007.jpg
    234.8 KB · Views: 1
Top