RichardG
Western Thunderer
Boiler fittings and handrails.
I have rather taken this observation of Ian's to heart. I can understand why a professional builder would buy a few aftermarket boiler fittings instead of spending a whole Sunday afternoon fettling the ones in the kit; but at my present skill level I think it is better for me to try to make the most of what I have.
I continued to lap the flares of the chimney, dome and safety valve to try to match the curves of the model. Just a careful motion on emery cloth pressed onto the surface of the model. The edges ended up sharp enough to feel like they would cut human flesh, so I stopped before they fell apart.
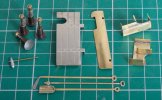
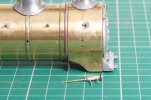
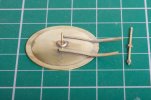
I wanted to clean up the outsides of the castings so I ended up adding some spigots to hold them from brass tube. I used tube partly because I didn't have any solid rod, but also tube has a lot less metal so easier to solder without melting the casting.
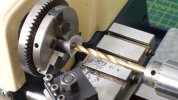
Metric drill bit slightly smaller than chosen imperial tube.
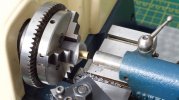
Tube pressed into place with tailstock, no soldering required!
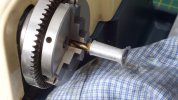
The drill bit for opening up the chimney had to jam sooner or later, so I had something to hold the casting while I dressed the surface.
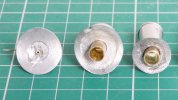
Evidence of hefty chuck use when holding dome. The tube for the chimney received some solder afterwards.
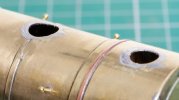
Light tinning to encourage bond of Araldite, I'm not sure if this is really necessary.
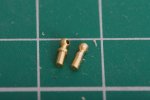
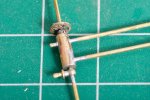
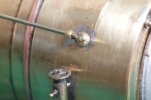
The handrails need a custom-length knob on the side of the smokebox, so I took a "short" knob and removed the shoulder. The wire held the knob in the right place while I soldered it up.
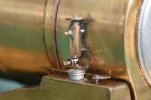
The handrail knobs went on after preparing the castings but before fixing them to the model. I used 188 degree solder paint for the knobs, a drop in each hole in the boiler and then a flash of heat from the micro flame torch. This is the first solder paint on the model, I bought the stuff months ago and couldn't get on with it. I suppose, necessity forced the issue. The paint actually worked really well, hardly any cleaning up afterwards.
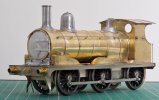
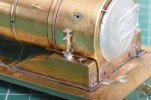
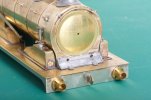
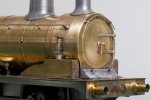
Photo composed to show off rather than show detail.
I feel the base of the chimney does look like it is closely attached to the smokebox wrapper, while the covers of the dome and safety valve look more like pressed steel parts resting in place, very happy
. . .
The skill in kit building has always been about taking the supplied parts and making the best of them.
Ian.
I have rather taken this observation of Ian's to heart. I can understand why a professional builder would buy a few aftermarket boiler fittings instead of spending a whole Sunday afternoon fettling the ones in the kit; but at my present skill level I think it is better for me to try to make the most of what I have.
I continued to lap the flares of the chimney, dome and safety valve to try to match the curves of the model. Just a careful motion on emery cloth pressed onto the surface of the model. The edges ended up sharp enough to feel like they would cut human flesh, so I stopped before they fell apart.
I wanted to clean up the outsides of the castings so I ended up adding some spigots to hold them from brass tube. I used tube partly because I didn't have any solid rod, but also tube has a lot less metal so easier to solder without melting the casting.

Metric drill bit slightly smaller than chosen imperial tube.

Tube pressed into place with tailstock, no soldering required!

The drill bit for opening up the chimney had to jam sooner or later, so I had something to hold the casting while I dressed the surface.

Evidence of hefty chuck use when holding dome. The tube for the chimney received some solder afterwards.

Light tinning to encourage bond of Araldite, I'm not sure if this is really necessary.

The handrails need a custom-length knob on the side of the smokebox, so I took a "short" knob and removed the shoulder. The wire held the knob in the right place while I soldered it up.
The handrail knobs went on after preparing the castings but before fixing them to the model. I used 188 degree solder paint for the knobs, a drop in each hole in the boiler and then a flash of heat from the micro flame torch. This is the first solder paint on the model, I bought the stuff months ago and couldn't get on with it. I suppose, necessity forced the issue. The paint actually worked really well, hardly any cleaning up afterwards.

Photo composed to show off rather than show detail.
- Safety valve base held with solder, I could get the iron inside the firebox
- Chimney, dome and sand box lids fixed with Araldite (the old-fashioned 24-hour one)
- Valve cover soldered onto only the smokebox, so the boiler assembly still detaches
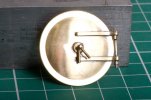
- LNER-style smokebox door added with double-sided tape because it makes the model look so much better while I find a GER one
I feel the base of the chimney does look like it is closely attached to the smokebox wrapper, while the covers of the dome and safety valve look more like pressed steel parts resting in place, very happy


