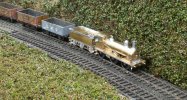
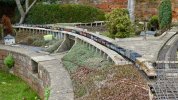
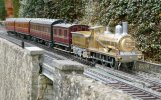
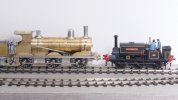
The Heybridge Railway, 1889 to 1913

spikey faz

Western Thunderer
The brass tube came in a pack of "mixed tube offcuts" from K&S Metals. This seemed a bit expensive at the time (I got several aluminium pieces as well as brass and copper ones), but it has been very useful for odd details from time to time, and making one fixture instead of buying a lost wax one does mean the pack has now paid for itself.

PS. I couldn't actually find a Roscoe lubricator to buy, so this rather forced the issue onto me and I'm glad I tried.
I think LG Miniatures sell a Roscoe lubricator, but the one you've made looks fine to me.

Mike
 

Richard Gawler

Western Thunderer
Hi Richard,
To stop it all falling apart, use higher melting point solder to add the details (188 or 225 degree) then use 100 degree to solder the door on.

I too use Lidl epoxy for the odd item that I can't solder.

It seems to me, every time I use 188 solder to make up an assembly I really want to stay with the 188 to fix the assembly onto the model. Because it's stronger than a lower temperature solder. So I end up clamping the forceps onto the assembly to make a heat shunt and sometimes wrapping things in soggy tissue paper.

It's curious but I have used 188 solder for almost the whole of the superstructure of this loco, often using exactly the same 40W soldering iron I struggled with for 145 solder on a wagon a year ago. Something to do with practice and better techniques!

The smokebox door ought to be a perfect place to try out the 100 degree solder, brass to brass . . . it's just that for this particular model the experience of the first unravelling smokebox has given me a phobia about applying any prolonged heat near here :rolleyes:
 

Richard Gawler

Western Thunderer
I think LG Miniatures sell a Roscoe lubricator, but the one you've made looks fine to me.

Mike
Thanks Mike. I actually made two - the first was about a millimetre longer and looked completely wrong on the model, so I salvaged the handwheel and started again. It wasn't the most fun part of the build, just that little bit too small to enjoy, but having done it I can try again next time with a bit more confidence.
 

Rob Pulham

Western Thunderer
It seems to me, every time I use 188 solder to make up an assembly I really want to stay with the 188 to fix the assembly onto the model. Because it's stronger than a lower temperature solder. So I end up clamping the forceps onto the assembly to make a heat shunt and sometimes wrapping things in soggy tissue paper.

It's curious but I have used 188 solder for almost the whole of the superstructure of this loco, often using exactly the same 40W soldering iron I struggled with for 145 solder on a wagon a year ago. Something to do with practice and better techniques!

The smokebox door ought to be a perfect place to try out the 100 degree solder, brass to brass . . . it's just that for this particular model the experience of the first unravelling smokebox has given me a phobia about applying any prolonged heat near here :rolleyes:
Hi Richard,
You will be surprised just how little heat you need with 100 degree solder so you shouldn't need to linger too long.
 

Richard Gawler

Western Thunderer
Hi Richard,
You will be surprised just how little heat you need with 100 degree solder so you shouldn't need to linger too long.

My 100 degree solder is in a solid stick about 1/4 inch square and I tend to spread the stuff all over the place - it flows, but in a funny way.

I have found a 138 degree solder paste online and ordered up a small tub . . .
Mechanic Low-Temp/Melt 138°C/148°C/158°C/183°C/217°C Soldering Paste UK | eBay

So I will have a go with this and report back.
 

Rob Pulham

Western Thunderer
My 100 degree solder is in a solid stick about 1/4 inch square and I tend to spread the stuff all over the place - it flows, but in a funny way.

I have found a 138 degree solder paste online and ordered up a small tub . . .
Mechanic Low-Temp/Melt 138°C/148°C/158°C/183°C/217°C Soldering Paste UK | eBay

So I will have a go with this and report back.
Hi Richard, mine too but I either melt a big blob then shake it off the iron on to my glass sheet then I squash said blob in smooth jawed pilers and cut small pieces off or, I use a chisel to shave some off to use in small pieces.

I have a wood chisel permanently on the bench that I use for removing parts from the fret if I can't get my topiary scissors in*. It also gets used for chopping solder into small pieces.

*Many thanks to @djparkins for the tip on using topiary scissors for removing parts from etches many moons ago.
 

Richard Gawler

Western Thunderer
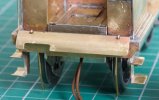
Cab fall plate and steps.

DSC_2166.jpg
I have ended up with the cab fall plate between the two handrails and not behind them. This involved trimming a millimetre or so from each end of the plate. I don't know whether this is an anomaly in the kit or I have got the handrails in the wrong place but I can make a guess :rolleyes:. The hinges are brass wire. The kit comes with some split pins for these but I used them all up doing and re-doing the similar plate on the tender.

During this session, one of the cab rails came adrift. It was the very devil to get back intro place and I ended up cutting it out, adding a new handrail and then a second new handrail. Soldering on the model is getting frustrating because there are too many small parts close together and attached to much bulkier parts. I re-do one and another goes crooked or drops off. Fortunately the clack valves and maybe the injectors can go on with glue.
 

Richard Gawler

Western Thunderer
Clack valves and pipes.

DSC_2169.jpg
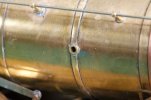
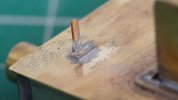
The clack valves and their pipes will go onto the model after painting. I have put a length of 3/32 inch tube through the boiler from side to side to make a pair of sockets to glue them into. Thanks to @warren haywood for this idea.

DSC_2171.jpg
Valve and pipe resting in position.

I succumbed to a pair of clack valves from Laurie Griffen. These are the first luxury items on the model apart from the Markits buffers and the brass smokebox dart. The whitemetal valves supplied in the kit would look fine from normal viewing distances; the brass ones have more definition and will look better in photographs. So a difficult decision.
 

Richard Gawler

Western Thunderer
Richard,

For future reference, Big Jim also does a pack of nice brass clack valves and elbow bends. There are enough in a pack for several locos.
Indeed he does. I discovered this shortly after placing the order to Laurie, where I had included the clack valves as a bit of a present to myself to offset the postal charge on the smokebox door . . .
 

Richard Gawler

Western Thunderer
Epoxy resin glue behind some metal parts.

Screenshot 2023-02-26 13.35.52.png

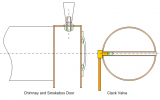
I want a break from assembly so I have done this sketch to try to show how I arranged the glue for the chimney and the smokebox door, and how I want to arrange it for the clack valves.

The important point is, metal parts are non-porous so the glue (two-part epoxy resin) always takes up a finite space . . . there has to be some free space for the glue to move into during assembly. If the glue is applied to the recessed or hollow part of the joint, then the assembly process will carry it further into the work.

Well, this is the plan. So far (and fingers crossed for the future) I haven't seen any glue oozing out onto the outside of the model.
 

Chas Levin

Western Thunderer
Hello Richard, nice work - I have a couple of questions please:

1. Forgive me if this is a stupid one but am I right that the small green ovals represent the glue?
2. That's a very neat and clear sketch: what software did you do it in please, as I keep using MS Word (for want of anything better and everything takes ages and looks poor!
 

Richard Gawler

Western Thunderer
Yes the green ovals are representing the glue, I trimmed this part of the explanation out of the post to make it shorter! I used Visio 2003 to do the sketch. This was part of the last generation of Office to have menus, before they went on to the ribbon interface.
 

Richard Gawler

Western Thunderer
Whistle, injectors and lamp irons.

DSC_2179.jpg
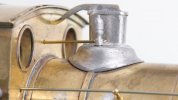
The whistle appeares in a previous post but here it is in position. One reason why I take so many photos is the camera reveals shortcomings I cannot see, like the sheared-off end of the wire link. The linkage on the safety valve is touching the cab but not fixed to it, and the whistle will stay loose for now so the boiler assembly can come off for painting. I am still pleased with the razor's edge on the base of the safety valve.

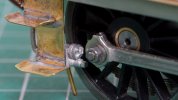
DSC_2203.jpgThe injectors come complete with cast-in pipes front and back. I ended up cutting off both the front pipes because I could find room for the pipe on one side of the model but not on the other and symmetry seems best. The lack of space is made worse by me having reinforced the insides of the steps with 0.5 mm brass . . . I know 0.5 mm sounds trivial but it makes the difference between 0.5 mm clearance and a collision with the side rod.

DSC_2198.jpg
Finally, the three lamp irons went on according to the design of the kit, a first for a while. I abandoned attempts to fit these on Nellie (soldering iron too clumsy) but the combination of solder paint and micro flame torch has helped me a lot. Actually, the first one was fairly easy. Getting the others to line up with the first and look symmetrical took a few goes.
 
. . dressed rehearsals and details before painting

Richard Gawler

Western Thunderer
I think, “this is it”. There is nothing for me to add to the loco until I fix the loose parts after painting and have a go at the cab interior.

DSC_2206.jpg
DSC_2221.jpg
The glossy paper background shows the vertical offset of the centre axle rather well - about 1/4 mm. I cannot see this when the model is on the track.

The parts to be fixed after painting are the buffer heads, clack valves and pipes, long handrails, whistle and (kindly cut for me by @simond ) the cab glazing. For the cab interior, I might wait and see what the model looks like painted before I decide how much to re-work the castings from the kit.
 
Last edited:

Richard Gawler

Western Thunderer
A visit to the Midland Railway.

P1040857.jpg

I took the loco to a friend’s railway earlier today. We began with this 16-wagon coal train.

P1040858.jpg
The track here is coarse standard and electrified using stud contacts. The loco ran really well everywhere it could cope with the track. It floundered on some of the pointwork with tighter curves (5 feet and less), and where the toll of winter has left a couple of broken fishplates.

P1040860.jpg
Then we tried a 30-wagon train. The loco could get this underway and keep it moving on the main line, but ran out of traction adhesion trying to pull the train through a facing crossover. This seemed like being right on the threshold of exceeding expectations. I added 110 grams of weight to the loco and it did exceed them. (The train is on the 'wrong line' here because it is too long for the train turntable behind it, and it will shortly cross to the correct running line.)

P1040862.jpg
This is a freight loco so I will have to imagine this is a working of some empty coaching stock during some kind of trial or locomotive exchange with the Midland.

Only four photos but all in all this was a wonderful time. The loco works, and works well. The major unknown now is how long it can run on a charge of its batteries. I suspect this will vary so much according to speeds and loadings I will never really know.
 
Last edited:

simond

Western Thunderer
That’s a decent train, thirty wagons, but be careful not to overweight, you always want the loco to have the escape route of wheelslip, to protect the motor and possibly the ESC.

If you can get an hour of actual train haulage, it’ll probably be sufficient for a good afternoon running session.
 

Richard Gawler

Western Thunderer
That’s a decent train, thirty wagons, but be careful not to overweight, you always want the loco to have the escape route of wheelslip, to protect the motor and possibly the ESC.

. . .

I have edited my last post, "adhesion" is a better world than "traction" to describe the limit with the loco wheels spinning.

DSC_2231.jpg
I don't know the correct or recommended weight for an 0-6-0. 'Blackwater' is a lot heavier than the Y14 (470 grams against 375 grams) and I guess Minerva went to some lengths to make the MW as heavy as she it.

There is no overload protection on the ESC so I might as well try to be sensible. The boiler backhead will add a bit of weight to the Y14 and so will a metal crew figure, so I will stop adding weight with these and not put any ballast into the boiler.

If you can get an hour of actual train haulage, it’ll probably be sufficient for a good afternoon running session.

The battery pack has only run flat once since purchase so I can lay aside any fears about the small capacity of the AAA cells. Perhaps, a couple of hours with longer trains and double this with 4 or 5 wagons on a small home layout when I can build one.
 
Last edited:

Richard Gawler

Western Thunderer
At Kettering and on an Indoor Garden Railway.

The loco had a couple of runs at Kettering yesterday, on the test track and on no track at all on the stand of Jim McGeown. The performance on the test track was a bit disappointing, a few derailments at baseboard joints where a much heavier live steam loco steamrollered its way through. Trundling backwards and forwards over Jim's boxes of kits was more fun.

The idea of radio control seemed to be new to some people who spoke to me, I think the overall impression was positive.

P1050004.jpg
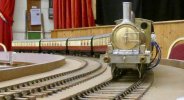
A friend has a demountable garden railway and they erected this in a village hall today. The loco pulled away with eight Thompson coaches on the level but we found that five was the limit for a complete circuit, there was a tiny gradient along the way. No derailments here.
 

Richard Gawler

Western Thunderer
I don't regard the regular derailments at Kettering as a failure. I want my trains to run on 0-MF track down to the radius of a B6, slightly tightened by setting the turnout on a curve to make the trackwork look better. Anything tighter than this is a bonus, but being able to negotiate a sideways step in the rails at a baseboard joint isn't part of the brief.

The Y14 and its tender are the largest stock I possess. So far, I have seen them separately negotiate my Peco Setrack turnout, where the curved gauge drops to around 31.3 mm, and a reverse curve beyond this added using Setrack. The loco lost its ability to run through the turnout when I removed the free play on the middle axle, but still manages the 32 mm Setrack curve.

Adding the close coupling between loco and tender has removed the ability for the pair to run on the Setrack curve, but I don't really mind. I want a loco which looks as realistic as I can manage, and having an enlarged gap between loco and tender will rather spoil things.

Screenshot 2023-03-06 07.14.23.png
This scheme would be a combination of test track, photographic diorama and a first attempt at scenics in 7mm scale.

Fundamentally, the track can challenge a specimen loco or wagon to a series of defined criteria. The track at the back is 31.5 mm gauge, the rest is 32 mm with the B6 tapering to make the transition. I imagine a DPDT switch to let me switch the two frogs from being live to dead. I have space for a 16 inch traverser to the left.

I would call this "Heybridge Basin". I think I have outgrown my present test track so any thoughts on this new one, either as a test track or as a layout, would be very welcome.
 
Top