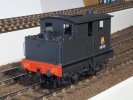
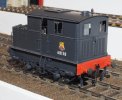
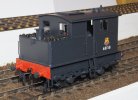
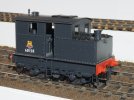
Very Little Gravitas Indeed*

adrian

Flying Squad
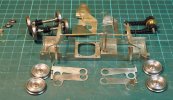
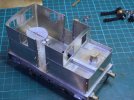
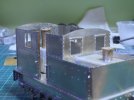
Next little update. The top plate was fitted to the tank area, this was just a flat sheet but from the drawing it looked like the water tank in the middle was raised so this was cut and bent from a bit of nickel-silver sheet. The cab doors and rear ventilation plates fitted. Something was slightly awry on bending the main cab sheets in that the door opening on the left hand side was spot on but on the right hand side it was ever so slightly wider such that there is a gap between the door and the frame. Rather than try to adjust things as it's barely noticeable I opted for having the door closed on the left hand side and open on the right hand side!

Sentinel-body-doors - 1.jpeg

Sentinel-body-doors - 2.jpeg

Sentinel-body-doors - 3.jpeg

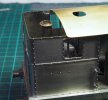
Next detail was going to be the window frames but I hit another slight hiccup. First - although there are 6 windows on the loco on the etch there are only 4 sliding frames. Not too much of a problem as the prototype photos rarely show all windows closed or partly closed, usually a couple are fully open, so I could make do with 4. Unfortunately when cut out and placed behind the opening it seems there is a size difference between the sliding unit and the frame and there is a noticeable gap.

Sentinel-body-doors - 4.jpeg

Nothing for it but I'm going to have to make some new sliding units, might as well make 6 whilst I'm at it!

Then I got side tracked :rolleyes: - the latest Guild Gazette dropped through the door. I have been considering dipping my toes into the DCC world and reading the review of the rolling road I thought one such item would be very useful/essential for setting up DCC. Then I saw the price £150 :eek: and thought that's the price of a coach kit or equivalent. So I raided my offcuts box to see if there was anything useable, some 1/8" brass strip and some 5mm perspex was dutifully cut up. I then made a little drilling jig to help things along.

Sentinel-body-doors - 6.jpeg

A few 6BA tapped holes and bushed 9x3x3 ball races later and it seemed to work okay. I've got some slightly shorter 6BA screws on order to tidy it up and need some brass strip to make up a static cradle for an non-powered tender or bogie - that and another 48 holes to tap to keep me busy.

Sentinel-body-doors - 5.jpeg
 

Yorkshire Dave

Western Thunderer
I have been considering dipping my toes into the DCC world and reading the review of the rolling road I thought one such item would be very useful/essential for setting up DCC.

A rolling road is only useful for running/breaking in locos prior to installation of decoders - which all I use a rolling road for.

All my decoder programming is either performed with the decoder on a decoder tester or within the loco on a length of track. I always set up a steam locomotive 'chuff rate' with the loco on a length of track as this provides resistance when checking the 'chuff' to the wheel rotation. In my experience a rolling road does not provide this.
 

Overseer

Western Thunderer
Adrian,
Do you know what the prototype of the kit is? The length, or lack of length could be due to it being based on one of the early Sentinels before the design settled down. I haven't found a prototype match for all the features in your kit but there could be some with the mix of features. The early locos had round cornered windows, had a symmetrical wheelbase and were shorter than the main 1920s production run locos. They also had a curved fillet between the cab and bunker and fancier beading (curved in section instead of flat).

The 1927 Sentinel catalogue has one illustration of an early standard gauge Sentinel. I think it is the one which went to Leys Malleable Castings.
sentinel1927cat.jpg

This should be a link to LNER 8400, one of the early Sentinels Lowestoft - LNER - Y1 class Sentinel 0-4-0T Shunter which had external beading and the simpler single curve roof, more similar to your kit.
 

paratom

Western Thunderer
To kick off the new area I've decided to post a few things currently on my workbench. Although I'm working on a few projects at the moment I don't seem to have anything completed to show even though I seem to manage some time at the workbench.

So I'm going to try with this thread to post a few things which don't seem to fit into the project updates.

To start with I'll cover two new acquisitions to the workbench. My father-in-law usually gives us all a small money gift for Christmas. He is a time served plumber, an apprentice under Sir Tom Finney, he has given me a few of his lead working tools and so I like to invest his Christmas gift in more tools for my workbench. This year the funds have gone into the purchase of a Knew Concepts piercing saw. I originally tried to buy it via Palmer Metals but after a few days it appears they no longer seem to be stocking them so I went to Betts Metal. The service was excellent and the saw is very nice.
Knew Concepts 75mm Sawframe | Betts Metal Sales
The second item is a Haff drawing pen, I kept looking on ebay for something suitable but decided that at the price that some people on ebay were asking it would be better just getting a new pen direct.
Drawing Pens
It took a couple of emails to sort out an invoice, payment and shipping but I got there eventually, I just need to find the time to practice with it.

View attachment 63442

I also decided that I needed to sort out a few extras for my mini lathe. It would be nice to get a small vertical milling machine but at the moments funds don't permit. The next best option I decided was to get a vertical slide for the lathe. This was purchased quite a while ago but I could decide on the best mounting arrangement. RDG Tools do a mounting bracket but this just extends it from the cross-slide which to me just seemed to restrict it's travel across the centre line of the lathe. So I got a flat steel plate and drilled it for attaching to the cross-slide bolts but then moved the vertical slide closer to the centre line. I got a 2 1/4" angle plate to provide a clamping surface for some projects but it looks a little bit overweight for the vertical slide. So I'm currently considering getting some steel bar stock to make a smaller horizontal clamping plate.
View attachment 63444

View attachment 63446

The final thing across the workbench recently are the new Mark Wood wheel castings for the 8F - very nice!
Scan b LMS 8F

View attachment 63443

I had bought some tender wheels from JPL a while ago as they seemed like an improvement over the Walsall Wheels offering. However there is a slight difference between these and the Mark Wood Wheels
View attachment 63445

Mark Wood publishes a slightly different sequence to what I have used in the past
Turning castings

So I decided to try this method on the JPL castings to practice before tackling the Mark Wood castings so this is where I'm up to, cut 4 on his turning plan.

View attachment 63447

the main shape has been roughed out, so the next step is removing the bulk of the material from the rear (cut 5) and then forming the profile. To form the profile the wheel is clamped between a couple of aluminium mandrels.
Suporting castings

As I don't have a power saw or bandsaw the thought of cutting 25mm discs in aluminium bar 1 1/2" diameter wasn't that attractive. Fortunately I found a company online offering custom cutting lengths so it worked out about £1.30 per disc, although if you have a friendly local model engineering company you might be able to find an similar arrangement possible.
Aluminium Round Bar
Again the service was excellent and I will use them again.


* My final note - to explain the title of the thread. As an avid reader one of my favourite authors is Iain (M) Banks. I enjoy both genres, non-sf Crow Road and Wasp Factory etc. and the sf stuff. Many pundits rate the Player of Games as one of his best but for me the first Culture book Consider Philebas is better but my favourite is Use of Weapons. In his culture the sentient ships have a long tradition of some rather quirky names, and in the Use of Weapons one such ship was named Very Little Gravitas Indeed which appealed to my sense of humour.

As another aside if anyone has watched SpaceX's stunning efforts to launch rockets and land them back on a barge. SES company first to use 'second-hand' SpaceX rocket - BBC News
The two barges are named - "Just Read the instructions" and "Of course I still Love you" in homage to Iain M Banks Culture ships.
Are you can't go wrong with Haff the finest ruling pens on the planet. I have a fine selection most of which were purchased on the German ebay site but there is one company in the UK that sells them whose name I can't recall.
 

adrian

Flying Squad
A rolling road is only useful for running/breaking in locos prior to installation of decoders - which all I use a rolling road for.

All my decoder programming is either performed with the decoder on a decoder tester or within the loco on a length of track. I always set up a steam locomotive 'chuff rate' with the loco on a length of track as this provides resistance when checking the 'chuff' to the wheel rotation. In my experience a rolling road does not provide this.
Yes I can see and acknowledge your point. The rolling road will be used for "breaking in" on plain DC first as well. As for the DCC setup the only fly in the ointment for me is that my only length of track available to me at the moment is populated by several finished and half completed projects. There is barely 6" spare at the end for the Sentinel! I need to either build a few more display shelves for the completed projects or build a Scale7 test track. :confused:
 

adrian

Flying Squad
Hi, finally back online once again. Apologies for absence the last half dozen weeks at work have been absolutely manic trying to finish off projects before the year end. Spending 10hrs a day staring at a screen debugging code and packaging for a release meant that last thing I wanted to do was go online and stare at a screen again but I did unwind at the workbench for a bit instead. Having got worked projects cleared out the way and chilled out over Christmas I now turn back to sorting out updates.

So a couple of posts to bring the Sentinel up to date. Before that I managed to get a few new bolts and finished off all the cradles for the rolling road. I've got a selection of jumper leads sorted to work out a system for electrically connecting them.Windows-Handrails - 2.jpeg

A bit of scrap etch was soldered together and cut out to form the inner windows. The front ones usually appeared to be fully shut but the side ones were soldered in in various stages of opening.

I decided to sort out the handrails at the same time. They are not the usual handrail knobs but just a simple cross drilled rod. So a little judicious drilling of some 0.9mm nickel silver wire was required.

Windows-Handrails - 1.jpeg

Windows and handrails fitted. Also sorted out the brake system and will cover in the next post.

Windows-Handrails - 6.jpeg

Windows-Handrails - 5.jpeg

Windows-Handrails - 4.jpeg
Windows-Handrails - 3.jpeg
 

adrian

Flying Squad
In the kit the brakes are a fairly simple etched affair. First there was no adjustment, second there were a rather 1 dimensional affair, 3rd there was a distinct lack of linkages and finally being metal limits how close they can be set to the wheel.

So in true Nick Dunhill style I decided to fabricate the system from various oddments from the material drawer. I used the hangers from the kit but they are the only remaining bit from the kit. The brake shoes are cut from PCB and slotted for the hanger, the copper surface scraped back to prevent electrical contact.

The cross beams and linkage were then fabricated from various bits of brass hex bar, copper tube, strips of nickel silver and 14ba bolts. The yokes are threaded as well to make it adjustable and the actuator linkage in the middle is designed so it can be easily removed to drop the sprung inner chassis. Not got any photos to illustrate that yet but I will do when I strip it for painting, which might make it clearer.

brakes - 1.jpeg

brakes - 2.jpeg

brakes - 3.jpeg

brakes - 4.jpeg

brakes - 5.jpeg

The final photo for this post is to show a simple gearbox cover, twofold - first to fill in a little of the empty space in the centre of the loco and second trying to work a simple way for fitting pickups, I wanted to fit it to the sprung inner chassis so that it could all be wired up without having to add connectors. Hence the step in the gearbox overlay will provide a nice ledge to glue a thin strip of PCB from which a phosphor-bronze wire and pickup from the top of the wheel.

brakes - 6.jpeg
 

adrian

Flying Squad
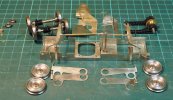
In amongst all the forum updates and other time demands I still managed to keep the Sentinel ticking along. First stripping the chassis down for painting - although I need to wait for a slightly warmer day before I dig out the airbrush.
sentinel - 1.jpeg

The next dilemma was the roof - the sides needed a little more stability as they will squish in a little so one option was to solder the roof to strengthen it up. The problem was that the boiler casting was, to be generous, a little rough around the edges. At some point it would be nice to replace it with something a little more accurate. The alternative was then to consider making the roof removable. However I worked out that I could tap a couple of threads into the bottom of the boiler casting and make it removable through the motor access hole.

sentinel - 2.jpeg

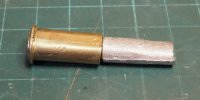
Next issue was the chimney - the brass casting supplied came up a little short.
sentinel - 3.jpeg

sentinel - 4.jpeg

There is a little whitemetal casting in the kit which may be intended as a packing piece but unfortunately too small to be useful.

sentinel - 5.jpeg

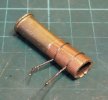
I new extension piece was made by squishing a piece of copper tube oval, slightly too wide so it needed a little cut and shut.

sentinel - 6.jpeg

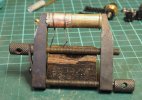
This was then clamped and soldered up with the blow torch.

sentinel - 7.jpeg

Then a few warm(er) days enabled me to apply a little paint to the chassis. Once completed it was re-assembled and attention has returned to finishing the body.

sentinel - 9.jpeg

sentinel - 8.jpeg
 

adrian

Flying Squad
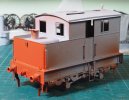
I hadn't realised I'd left it so long for an update, only when commenting on @Rob Pulham thread about painting did I realise I should have posted something.

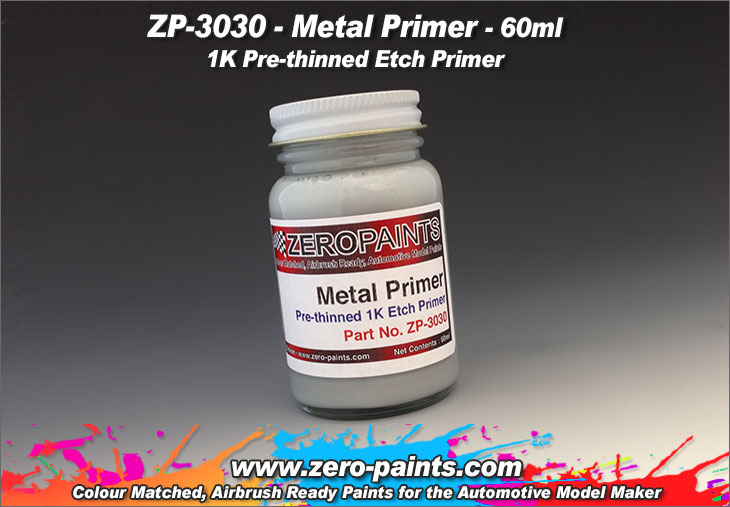
The bodywork was finished to waft a coat of primer. Following recommendation from @Brian McKenzie I've started using Zero paints so this was the single pack metal primer.


Sentinel_update - 3.jpeg

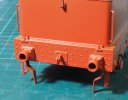
Having done that I then painted the buffer beams. I don't know what it is with the red the coverage on flat panels is fine but round the rivets and buffers I always seem to struggle to get decent coverage. This is already 3 coats but still needs another one to fill around the nooks and crannies.

Sentinel_update - 2.jpeg

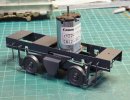
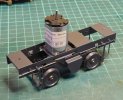
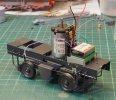
This is also my first experiment with DCC + sound, trying to decide whether to mount in the body and connect to the motor and pickups but in the end decided on working it up all fitted to the chassis. Still work in progress but it's looking like this with the speaker mounted between a couple of plates which can be unscrewed if needed, the stay-alive capacitor stuck on top. The DCC chip vertical next to the motor. It all just needs wiring up now.

Sentinel_update - 1.jpeg
 

Chas Levin

Western Thunderer
Hello Adrian, I'm quite used to the look of NS rods and I read your post early in this thread about how they don't look like the real thing - steel - and thought I'd probably not notice too much difference... but they certainly do look 100% better, don't they?
It'll be a while before I get there - no lathe yet, for starters - but one day, I shall follow your path...
 

adrian

Flying Squad
have you converted it to an 0-8-0?
:p no dual gauge!

The ones on the axles were plastic centred ones supplied in the kit but were finescale so would need turning to Scale7 profile, also if you look closely would also need a spacer washer to widen to Scale7. I already had a set of steel wheels from Roxey Mouldings which I'd profiled to Scale7 so I turned some Tufnol bushes with a thicker boss for them to give the required back to back on the supplied axles.
 

adrian

Flying Squad
Finally got round to finishing the Sentinel so an update.

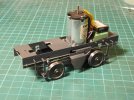
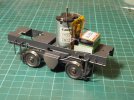
The positioning of the DCC chip, speaker and capacitor all worked in place and fitted under the bodywork. So this is the completed chassis, all the electronic gubbins fitted on the chassis so I don't need to mess around with connectors to the main body.

Sentinel_finished - 2.jpeg

Sentinel_finished - 1.jpeg

A lick of black paint, a few transfers, windows and coaling sorted.

Sentinel_finished - 6.jpeg

Sentinel_finished - 4.jpeg


Sentinel_finished - 5.jpeg

Sentinel_finished - 3.jpeg

Overall quite happy with the results, although as usual the photos shows the bits I've missed, so the red wire to the motor needs a bit of black paint to hide it. It's the first loco I've fitted with DCC/Sound/Stay alive and very happy with it. It runs very smoothly and fiddling with the chuff rate gives a nice high revving engine which seems similar to the full size locos. I still to learn a lot about the DCC settings, it seems to change a bit at mid to high speed so still needs some tweaking.
 

jonte

Western Thunderer
After all your hard work, skill and knowledge in creating this little gem, Adrian, I feel a little churlish asking this but what are the origins of your coal, please?

Many thanks,

Jonte
 

adrian

Flying Squad
After all your hard work, skill and knowledge in creating this little gem, Adrian, I feel a little churlish asking this but what are the origins of your coal, please?

Many thanks,

Jonte

No problem - it's a mix of 2, I was getting some Glue'n'glaze following Rob's promotion and spotted this to try. So it's all from Model Scenery Supplies, and just got a couple of bags to try.

For the larger lumps I used the Busch coal

but then for the smaller chunks I used the Natural Scenics coal

I used the Size 2 lump coal just to see what it was like and very happy with it, no dust, a good variety of shapes and a bit of sparkle. I'll definitely re-order and get some of the smaller sizes to get a full range of sizes.

p.s. forgot to say I used the Glue'n'Glaze to glue the coal in place as well.
 

LarryG

Western Thunderer
I presume you sprayed it with Zero paint. The black is quite grey compared with the coal and as such is most attractive.
 

adrian

Flying Squad
I presume you sprayed it with Zero paint. The black is quite grey compared with the coal and as such is most attractive.

Yes it is Zero paints - I was just following @Ian_C 's lead mixing a touch of grey in the black semi-gloss and I much prefer the look over pure black. Obviously I haven't yet summoned the courage to start weathering it yet but it will be done at some point.

When I placed it next to a couple of other locos that were painted pure black it really showed up the difference. I'll sort out a photo of 2 side by side tomorrow, suffice to say I was never happy with the finish on them so I've stripped a couple and partway through repainting them!
 

jonte

Western Thunderer
Many thanks @adrian for sharing.

Perhaps I can return the favour with your mention of further weathering?

Please forgive my ignorance of locos in general as I’m more of a modeller than a train buff, and so approach the hobby more from the artistic side of things, but I’ve noticed that the smoke box areas of steam locos tend to display a warmer effect or tone, one which I’ve tried to improve upon in my own work. I’ve termed this shade of black, ‘weathered black’, or perhaps it would have been better using the phrase ‘warm black’?

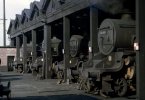
Anyway, I recently discovered a photo on line which is probably one of the best I’ve seen of this effect and one I’d like to show for reference purposes:

8D58B211-0D76-47EB-9DB0-0215C1844195.jpeg

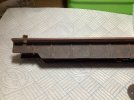
It’s of (I think) the engine shed at Lostock Hall near Preston, and one which adequately shows the effect I’ve seen on so many other photos of weathered engines. Using it as a guide, I trialed several mixes and settled on a proportion of 2:1:1 of Matt black:leather:mid grey in Humbrol/Tamiya acrylics. I’ve used it to paint the turntable deck in my latest project:

19CB3A03-0031-47BC-90D7-D7C7FDAFC6CE.jpeg

I hope you’ll agree, it more or less captures the warm tone displayed by the locos in the above photo.

Thanks once again for your help, and I hope the above is of some use to you.

Jonte
 
Top