You are using an out of date browser. It may not display this or other websites correctly.
You should upgrade or use an alternative browser.
You should upgrade or use an alternative browser.
Very Little Gravitas Indeed*
- Thread starter adrian
- Start date
adrian
Flying Squad
The difference is much more stark when I line it up against the other Sentinel painted in solid black.I presume you sprayed it with Zero paint. The black is quite grey compared with the coal and as such is most attractive.
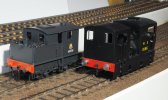
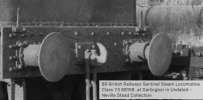
The only thing it has highlighted is that the bufferheads on the Y3 are woefully undersized. Replacements will have to be sourced/made as I can't un-see it now and it's really annoying me.
For comparison
adrian
Flying Squad
I'm really going to have to brush up on my video editing skills - trying to juggle camera panning and JMRI Throttle all at the same time was not the easiest of tasks. Hopefully the sound quality is adequate to show the effect.
Just about visible if you squint but I'm rather satisfied with being able to see the chain drive working JLTRT!
Just about visible if you squint but I'm rather satisfied with being able to see the chain drive working JLTRT!
LarryG
Western Thunderer
Adrian, thanks for posting the side-by-side comparison. I guessed the grey would look like that compared with pure black. It looks right for the everyday finish of a steam loco and doesn't require much more work in the way of weathering. Certainly food for thought.
I see your point about buffers. Size does matter as I found on GWR carriages.
DCC sound can be pretty good and it sounds fine in the Sentinel. There's a lot of dross out there with sound levels that are 'built-in' and cannot be reduced by the twiddling the CV's. After three years, I gave up trying to make something sensible out of it.
I see your point about buffers. Size does matter as I found on GWR carriages.

DCC sound can be pretty good and it sounds fine in the Sentinel. There's a lot of dross out there with sound levels that are 'built-in' and cannot be reduced by the twiddling the CV's. After three years, I gave up trying to make something sensible out of it.
adrian
Flying Squad
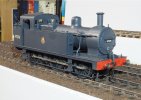
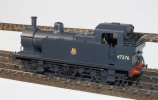
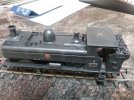
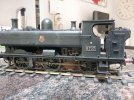
So many many ..... many years (decades!) ago I built a couple of loco's and posted a few photo's on WT. Although the loco's were finished I never got round to posting any photo's of the finished painted items.
There were many reasons for this, one of the excuses is that I was never happy with the paint finish on them so I was reluctant to post photos knowing that it was going to be my intention to strip and repaint them anyway. I kept putting off the repaint job until I was happy that I could make a halfway decent job of it. As it was the Jinty required 2 repaints i.e. it's on it's 3rd paint job now and for a very simple black paint job really sort of inexcusable. The first paint job used a badger airbrush and enamel paints, basically it was a bit of an orange peel finish and too thick losing crisp detail. The second attempt was using cellulose and an Iwata Neo, the finish was better but very patchy an uneven, I also struggled to get any consistency of thinning for spraying. So finally after more changes another upgrade to an Iwata TR2 and using zero paints I've managed to get a finish I'm happy with. I do think the change to the TR2 has helped me in that the trigger is a pistol grip rather than the button on top which is more comfortable and the zero paints already pre-thinned for the airbrush means it's a lot easier to chuck in the airbrush, with a dash of grey added to the black.
Given the results with DCC and sound on the Sentinel I have fitted DCC, stay alive and sound to the 3F, the improvement to the running qualities was marked so as soon as funds permit the Jinty will also be retro fitted with DCC, stay alive and sound.
Anyway enough of the waffle and excuses - just the photo's to present now.
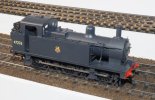
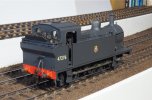
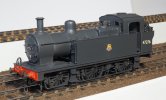
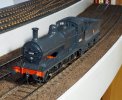
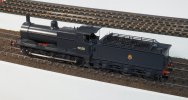
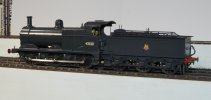
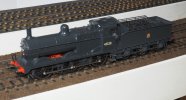
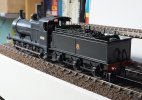


Paul Tomlinson
Western Thunderer
I was reading about them earlier today on your website ... along with your model of Holywell Town, a few miles down the coast from me. The Avatar's Mostyn. Cheers.Sorry - forgot to say for the benefit of the new members, the Jinty is a Connoisseur model with a few tweaks and the 3F is the JLTRT offering, again with a few tweaks.
Cherryclan - A potpourri of articles from a sporadic modeller.
A potpourri of articles from a sporadic modeller.
 www.cherryclan.com
paulc
Western Thunderer
Hi Adrian , there is an alternative to a complete respray and that is weathering. MIG have a product called a an oilbrusher and one of the colours is called ' Starship Filth' . Its an oil based paint and only requires a few dabs on the side of a loco and then brushing out with a flat brush . It will spread from here to the moon and you can keep working it for at least a 1/2 hour which is how long each side took on the pannier . Just a warning, there is another product with the same name ie 'starship filth' in a tube from a german company , this is too dark so will not achieve the same result , actually on a black loco its a complete wate of time .So many many ..... many years (decades!) ago I built a couple of loco's and posted a few photo's on WT. Although the loco's were finished I never got round to posting any photo's of the finished painted items.
There were many reasons for this, one of the excuses is that I was never happy with the paint finish on them so I was reluctant to post photos knowing that it was going to be my intention to strip and repaint them anyway. I kept putting off the repaint job until I was happy that I could make a halfway decent job of it. As it was the Jinty required 2 repaints i.e. it's on it's 3rd paint job now and for a very simple black paint job really sort of inexcusable. The first paint job used a badger airbrush and enamel paints, basically it was a bit of an orange peel finish and too thick losing crisp detail. The second attempt was using cellulose and an Iwata Neo, the finish was better but very patchy an uneven, I also struggled to get any consistency of thinning for spraying. So finally after more changes another upgrade to an Iwata TR2 and using zero paints I've managed to get a finish I'm happy with. I do think the change to the TR2 has helped me in that the trigger is a pistol grip rather than the button on top which is more comfortable and the zero paints already pre-thinned for the airbrush means it's a lot easier to chuck in the airbrush, with a dash of grey added to the black.
Given the results with DCC and sound on the Sentinel I have fitted DCC, stay alive and sound to the 3F, the improvement to the running qualities was marked so as soon as funds permit the Jinty will also be retro fitted with DCC, stay alive and sound.
Anyway enough of the waffle and excuses - just the photo's to present now.
View attachment 163204
View attachment 163202
View attachment 163203
View attachment 163205
View attachment 163201
View attachment 163200
View attachment 163196
View attachment 163197
View attachment 163199
View attachment 163198

Focalplane
Western Thunderer
Adrian, the Jinty looks so good I think I will have to try out the Zero. My Connoisseur Jinty (see avatar) was my first kit and I brush painted it, so your example is well worth emulating. Thank you for sharing!
Paul
Paul
adrian
Flying Squad
Cheers - that's another "paint job" - the website is well out of date and needs a refresh. Unfortunately that version is built on Wordpress and I've come to hate it with a passion so I don't enjoy touching it at the moment. Too many updates and then trying to make sure the additional plugins haven't broken or need updating is a real PITA.I was reading about them earlier today on your website ... along with your model of Holywell Town, a few miles down the coast from me. The Avatar's Mostyn. Cheers.
So again part way through a rebuild and re-release at some point.
I know, I know, fully agree at some point I need to embrace the weathering of my models, but until I have a layout on which to run them then I'll keep using that as an excuse to putting it off. Although w.r.t. the painting I find it easier to make a pigs ear out of a silk purse rather than the other way round. Hence I would like to get the paint looking reasonable first prior to weathering.Hi Adrian , there is an alternative to a complete respray and that is weathering. MIG have a product called a an oilbrusher and one of the colours is called ' Starship Filth' . Its an oil based paint and only requires a few dabs on the side of a loco and then brushing out with a flat brush . It will spread from here to the moon and you can keep working it for at least a 1/2 hour which is how long each side took on the pannier .
adrian
Flying Squad
Having virtually finished the locos it was really nice to have a general clean up and make some space on the workbench for the next project.
I decided to switch back to building a couple of wagons, in this case a kit obtained last year for a Palbrick.
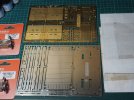
There have been a couple of threads previously on WT building these, albeit in 4mm rather than Scale7. So I don't think I'll post many photos during the build, besides which the kit includes a CD with a very comprehensive set of build photos. Hence there maybe an occasional update or posting if I've gone off piste.
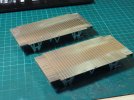
Anyway the chassis all folds up quite nicely
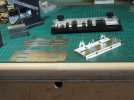
By this point there are already 3 layers of etches with the chassis, middle layer and half etched floor so there is already a fair bit of weight to the kit. Once everything is fitted I reckon it won't need any additional weight added.
One question for the 7mm WT modellers - as supplied the kit is etches only so I need to source a few cast components, the first for consideration are the buffers. Unfortunately the recommended supplier is no longer trading so I need to find some that look like this
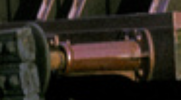
Can anyone point me in the right direction for a 7mm supplier of these buffers, being an ignoramus in these matters I don't know what they are called and the various websites so far visited list various buffers by name but with no photos attached I'm not sure what I'm ordering.

I decided to switch back to building a couple of wagons, in this case a kit obtained last year for a Palbrick.

There have been a couple of threads previously on WT building these, albeit in 4mm rather than Scale7. So I don't think I'll post many photos during the build, besides which the kit includes a CD with a very comprehensive set of build photos. Hence there maybe an occasional update or posting if I've gone off piste.
Anyway the chassis all folds up quite nicely

By this point there are already 3 layers of etches with the chassis, middle layer and half etched floor so there is already a fair bit of weight to the kit. Once everything is fitted I reckon it won't need any additional weight added.

One question for the 7mm WT modellers - as supplied the kit is etches only so I need to source a few cast components, the first for consideration are the buffers. Unfortunately the recommended supplier is no longer trading so I need to find some that look like this

Can anyone point me in the right direction for a 7mm supplier of these buffers, being an ignoramus in these matters I don't know what they are called and the various websites so far visited list various buffers by name but with no photos attached I'm not sure what I'm ordering.

Overseer
Western Thunderer
They are RCH 2 rib 20.5" buffers, used mainly on vacuum braked vans but also other vacuum braked wagons. David Parkins has some ABS ones on sale described as 'BR Extended two rib fitted RCH buffer set' (product.php) which should be the right ones but I am not certain and buffer heads will be also be needed. They were made in cast steel and fabricated (welded) steel versions which look similar but different.Can anyone point me in the right direction for a 7mm supplier of these buffers, being an ignoramus in these matters I don't know what they are called and the various websites so far visited list various buffers by name but with no photos attached I'm not sure what I'm ordering.
AJC
Western Thunderer
They are RCH 2 rib 20.5" buffers, used mainly on vacuum braked vans but also other vacuum braked wagons. David Parkins has some ABS ones on sale described as 'BR Extended two rib fitted RCH buffer set' (product.php) which should be the right ones but I am not certain and buffer heads will be also be needed. They were made in cast steel and fabricated (welded) steel versions which look similar but different.
I reckon the one shown is a fabricated example (three ribs with a step on top, I think), apparently parallel stock (not that this matters overmuch). The ABS produce Fraser links to is what I'd go for in your place.
Adam
Heather Kay
Western Thunderer
I wonder if the buffers Slater's do for their BR wagon range would suit. Might be worth giving them a ring.
Lyndhurstman
Western Thunderer
Having virtually finished the locos it was really nice to have a general clean up and make some space on the workbench for the next project.
View attachment 163531
I decided to switch back to building a couple of wagons, in this case a kit obtained last year for a Palbrick.
View attachment 163530
There have been a couple of threads previously on WT building these, albeit in 4mm rather than Scale7. So I don't think I'll post many photos during the build, besides which the kit includes a CD with a very comprehensive set of build photos. Hence there maybe an occasional update or posting if I've gone off piste.
Anyway the chassis all folds up quite nicely
View attachment 163529
By this point there are already 3 layers of etches with the chassis, middle layer and half etched floor so there is already a fair bit of weight to the kit. Once everything is fitted I reckon it won't need any additional weight added.
View attachment 163528
One question for the 7mm WT modellers - as supplied the kit is etches only so I need to source a few cast components, the first for consideration are the buffers. Unfortunately the recommended supplier is no longer trading so I need to find some that look like this
View attachment 163534
Can anyone point me in the right direction for a 7mm supplier of these buffers, being an ignoramus in these matters I don't know what they are called and the various websites so far visited list various buffers by name but with no photos attached I'm not sure what I'm ordering.
Hello @adrian
Ooh.. that does look nice... and easier to see than the 4 mm one! In the smaller scale, it's a well-designed kit. Very easy. And - as you say - quite weighty, despite the finesse. Not as weighty as the old Keyser version though!
The only issue I had is that I spend all day on my PC for work, and so would rather have had printed instructions!

Cheers
Jan
Bill Campbell
Western Thunderer
Hi AdrianOne question for the 7mm WT modellers - as supplied the kit is etches only so I need to source a few cast components, the first for consideration are the buffers. Unfortunately the recommended supplier is no longer trading so I need to find some that look like this
View attachment 163534
Can anyone point me in the right direction for a 7mm supplier of these buffers, being an ignoramus in these matters I don't know what they are called and the various websites so far visited list various buffers by name but with no photos attached I'm not sure what I'm ordering.
Have look at Invertrain's website - there is a large range available.
Regards.
adrian
Flying Squad
Thanks everyone for the suggestions re the buffers. I've ordered a few to see what turns up, Although Invertrain has a large range now he hasn't kept the NMRS reference numbers (not that I'd expect him to though!) so it has made it a little bit of a gamble. Also decided to try some MMP items for comparison but they worked out rather expensive as another kit "accidently" fell into the shopping cart at the same time!
As for the kit a little progress, the half etched overlays for the solebars were added, however rather than soldering them on and then having to clean them up I left them loose but then soldered in all the little triangular supports from the rear to hold them in place so minimal cleaning up required.
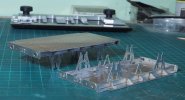
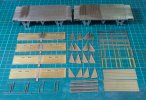
The rest of the time has been spent just preparing, filing and folding, the multitude of components to make up the body.
As for the kit a little progress, the half etched overlays for the solebars were added, however rather than soldering them on and then having to clean them up I left them loose but then soldered in all the little triangular supports from the rear to hold them in place so minimal cleaning up required.

The rest of the time has been spent just preparing, filing and folding, the multitude of components to make up the body.

adrian
Flying Squad
Just realised I'd been merrily ploughing along with the build and not taken many photos, fortunately as mentioned there are plenty of build photos supplied with the kit.
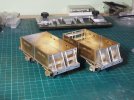
Anyway I've soldered together all the main body components, no problems encountered everything fitted together nicely. The next bit in the instructions started assembling the brake gear, this is where I deviated slightly preferring to sort out the springs and axleboxes first to get the wheels positioned before tackling the brake gear. Although at this point I rued the decision of building two at once as it was a lot more components to cut out and fold up. The assembled body still need a good clean up.
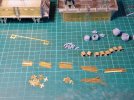
Springs, hangars etc all assembled.
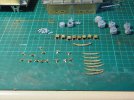
The axleboxes are an interesting design being folded up from an etch they are hollow with a slot for the wheel bearing to slot into. When finished the tie-bar has an extended tab to lock the wheels into position. I do like fitting spring suspension to all my builds so I spent a little while trying to figure out a way to fit small coil springs or a wire spring onto the bearings but couldn't work out anything suitable. Fortunately my avatar provided suitable inspiration and I had some dense foam pads to try, lifting blocks from youngest child's rugby kit!
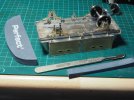
So I elongated the bearing slots to allow for a little bit of movement and cut up the pads to slot into the hollow axlebox.
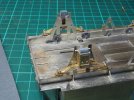
So now have rubber suspension.
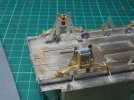
It'll be interesting to see how long they last but first impressions are very favourable. It seems to have worked quite well and provides a nice cushioned ride to the wagons.
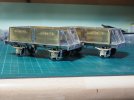
Now to sort out the brake gear.
Anyway I've soldered together all the main body components, no problems encountered everything fitted together nicely. The next bit in the instructions started assembling the brake gear, this is where I deviated slightly preferring to sort out the springs and axleboxes first to get the wheels positioned before tackling the brake gear. Although at this point I rued the decision of building two at once as it was a lot more components to cut out and fold up. The assembled body still need a good clean up.

Springs, hangars etc all assembled.

The axleboxes are an interesting design being folded up from an etch they are hollow with a slot for the wheel bearing to slot into. When finished the tie-bar has an extended tab to lock the wheels into position. I do like fitting spring suspension to all my builds so I spent a little while trying to figure out a way to fit small coil springs or a wire spring onto the bearings but couldn't work out anything suitable. Fortunately my avatar provided suitable inspiration and I had some dense foam pads to try, lifting blocks from youngest child's rugby kit!

So I elongated the bearing slots to allow for a little bit of movement and cut up the pads to slot into the hollow axlebox.

So now have rubber suspension.

It'll be interesting to see how long they last but first impressions are very favourable. It seems to have worked quite well and provides a nice cushioned ride to the wagons.


Now to sort out the brake gear.
Chris Veitch
Western Thunderer
It would good to see any progress on Holywell (says he, inspired by an upcoming trip to the 2FS Diamond Jubilee exhibition) although I understand very well the problem of conflicting demands on modelling time...... along with your model of Holywell Town
