Monks Ferry: a layout for the Grandchildren.

John57sharp

Western Thunderer
And so, with the dulcet tones of Mr. Manilow reminding me that he couldn’t possibly smile without me, I’ll continue to cut ‘n’ paste ‘ad infitum’.
If you only knew, what I'm going through
I just can't tile without you…

Have to say that the old roof looks remarkably well distressed.

John sibling of an obsessive Barry fan.
 

jonte

Western Thunderer
Well, guys, I submit this by way of an update. In truth, not that much to update really, apart from ‘it’s all change’ on the tiling front.

After cutting out a couple of hundred or so of my intended graph paper slates, I made a start at sticking them on: all two of ‘em, to be exact, before succumbing……..To be fair, once you get into a rhythm, the process seems to fly by. However, currently I’m experiencing a host of distractions (some welcome, some not so), and since my last post, I’ve barely pulled up a chair to my temporary modelling desk, and I can’t see it changing anytime soon.

So after ‘unsticking’ the two valiant attempts mentioned above, I hit upon an idea that might hasten matters: proprietary stick on ones. As I really needed to get this build to a point somewhere nearing completion before baseboard building and track laying begins in earnest (I estimate at least six weeks at present), it seemed the ultimate solution. So a couple of hours was spent one evening, after my building party had departed, to trace a sheet I’d ordered last year for another project, just to see. I recall I hadn’t been impressed, so to the back of somewhere or other they went. Only, could I remember where somewhere or other was……..

I eventually found them and slid them from their clear cellophane sleeve (I’d been that underwhelmed when receiving them, I hadn’t even bothered to remove them), and took another glance with fresh eyes. They still looked too ‘big’ and too thick for my purposes, although the pre-coloured ‘weathered’ variety I’d received didn’t look too bad I suppose. But as beggars can’t be choosers, I began to release them from their paper sprues………

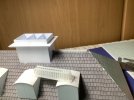
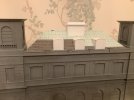
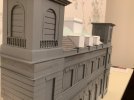
Despite the constant interruptions, I managed to get a good go at it late afternoon and this is as far as I got:
IMG_2337.jpegIMG_2338.jpeg

Still not a lot of progress, but a bag full compared to my attempt with my bespoke version.

I showed them to my brother-in-law, a retired builder, who assured me that the proportions are correct, however I still remain to be convinced.

The pre-pasted graph paper guides have proved a boon here, especially in this front section where the auxiliary appendages prevent a good single run at things, but the uncluttered rest of the roof should see me making timely progress, provided there aren’t too many interruptions.

There might even be sufficient to dress the rest of the roof as shown, however, more will no doubt be required for the side roof sections yet to be addressed. Incidentally, the next order will be for the plain variety as the whole thing will be primed in due course for painting.

The only problem foreseen is that the provided ridge tiles are rather plain and without relief, so I’ve begun scratching my bonce once more to come up with a viable solution. One or two ideas spring to mind, but I require one with a quick fix. Some nice printed examples out there, but a little pricey. I’ve plenty of Wills versions, but as they’ve a flat base, they’re neither use nor ornament.

So there we are: so much for best intentions.

jonte
 

Lyndhurstman

Western Thunderer
Good stuff Jon, and I hear what you say about maintaining your doubts even when experts have confirmed otherwise! I’m still not sure that I was right in damning a manufacturers brake lever for the MEDFIT, despite what my eyes were telling me :)

FWIW, they look fine to me, too
Cheers
Jan
 

jonte

Western Thunderer
Good stuff Jon, and I hear what you say about maintaining your doubts even when experts have confirmed otherwise! I’m still not sure that I was right in damning a manufacturers brake lever for the MEDFIT, despite what my eyes were telling me :)

FWIW, they look fine to me, too
Cheers
Jan
Good to see I’m not alone, in that respect, Jan.

I really do value your opinion :thumbs:

Thanks.

Jon
 

Roger Pound

Western Thunderer
I would agree that the slates look fine and proportionate. Don't get too bogged down on the probability of being a half-millimetre out, Jon. Otherwise the grandchildren will be full-grown before you get the track laid.......... :eek:!

Roger ;).
 

jonte

Western Thunderer
I would agree that the slates look fine and proportionate. Don't get too bogged down on the probability of being a half-millimetre out, Jon. Otherwise the grandchildren will be full-grown before you get the track laid.......... :eek:!

Roger ;).
And therein lies my primary concern with this build, Roger.

Gotta keep the pace going.

Now where did I see those printed ridge tiles ;)

All the best,

Jon
 

jonte

Western Thunderer
I've got some spares from Metcalfe kits. If they are suitable for your purpose - let me know and I'll send some.

Roger
Most of kind of you to offer, Roger, however, they’re already in transit from Smart Models.

My sincerest thanks in any case :thumbs:

Now I’m off for a shower to remove the detritus after swapping the new door to my workshop for my ‘old’ plastic one, removed by the builders and stored for just this purpose. The door we fitted (a Buy and Queue cheapo) kept swelling with the humidity in the garage so had to go. Unfortunately, this was made all the more onerous by having to remove and replace tools and materials stored in their by the builders and kitchen fitter respectfully. Thank goodness the plasterers take their gear with them (back Tuesday to complete the task(s)). There are still more trades to come……then they start on the front and rear gardens….and replace a bank of tikes over the rear bays which should have been done when we had the new roof a couple of years ago…….

Will we ever be free of this darned building site :(

Thanks for popping by,

Jon
 

jonte

Western Thunderer
HI Jon
Looking at the pictures the slate tiles look perfect on your building.
What sort of roofing will you put on the dormer windows?
David.
Hi David

Many thanks for the compliment. I guess they’ll have to stay then :)

The dormers are a work in progress which I’ll return to in due course, but my brother in law reliably informs me that the rooves of such were clothed in lead. In fact, he went into some detail…………….. Needless to say, I’ll probably coat them with some suitably coloured fag paper painted to look like lead, or at least the nearest I can make it.

Hope that helps, David, and many thanks for your interest.

Jon
 

simond

Western Thunderer
Thanks, Simon: I’m guessing verde gris?

Interesting.

Jon
Yes, but in an urban (smoky) environment it’ll be grey with maybe more than a hint of copper oxide green, I guess.

Contemporary photos of similar will be your guide!

There was a church in the North End in Birkenhead (Worcester Rd/Hoylake Rd) had a copper roof. I think it was quite green last time I passed and it certainly is on Google earth, but I expect that’s the effects of fifty odd years of the clean air act!
 

jonte

Western Thunderer
Yes, but in an urban (smoky) environment it’ll be grey with maybe more than a hint of copper oxide green, I guess.

Contemporary photos of similar will be your guide!

There was a church in the North End in Birkenhead (Worcester Rd/Hoylake Rd) had a copper roof. I think it was quite green last time I passed and it certainly is on Google earth, but I expect that’s the effects of fifty odd years of the clean air act!

Indeed.

Thanks, Simon.

Jon
 

jonte

Western Thunderer
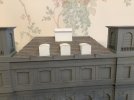
Had a bash at finishing the front section this morning, and as anticipated, was whole lot quicker now that there’s a ‘clear’ run.

It’s a cliche perhaps, but I stuck in one or two broken or slipped slates, although with a building of this stature, I doubt it would have been the case unless the result of shock waves from bombing etc..

Needs tidying, and of course ‘flashing’ in due course, but it’ll do for now:

IMG_2344.jpegIMG_2345.jpeg


Also seen is a length of 3D printed ridge tiles from Smart Models received in the lunchtime post, just placed atop for viewing. The sprue from which it was detached can also be seen. There are three to each sprue, and two sprues per box. I bought two boxes for this job. Usual caveat applies.

Now to finish the other three sides.

jonte
 

jonte

Western Thunderer
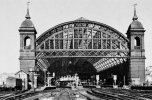
Just build some side walls and a pair of towers it'll look more like Cannon Street rather than Blackfriars.....:)

View attachment 211243

There's even a section of the roof drawing on the Network Rail website The history of London Cannon Street station - Network Rail

Thanks, Dave.

Thanks too for the link; I’ve enjoyed scrutinising that already as my intended course is along the lines as you suggest.

To that end, I’ve been in contact with a proprietor who produces laser kits, and who’s offered to amend the dimensions of a girder bridge kit to suit my needs. You see, the girder sections strongly resemble the arch strung between the towers in your photo, the pretence being that the rest of the roof had been removed due to war damage, which pretty much fits with the story of the real Cannon Street.
That said, since we first spoke numerous emails and promises to return phone calls have been, well, overlooked, such that I’m now considering other options as I really need to finish this in the next few weeks. When I last phoned, the week before last, his assistant advised me to keep an eye out on their website for the release of a bigger girder bridge kit which is apparently nearer my desired size. I needn’t have held my breath. To be fair, a number of the hobby’s proprietors have full or part time jobs, however, it doesn’t take a minute or two to knock out a brief acknowledgment. So unprofessional.

Returning to my dilemma, only this afternoon, thoughts returned to my seemingly abandoned and, so far, unused station roof as a viable plan B once more, only this time it may involve surgery with a pair of Xuron cutters……

Watch this space ;)

Jon
 

jonte

Western Thunderer
Managed to get approximately a third of the way up the final (rear) section of roof before I ran out of tiles/slates, as expected. More are on order.

Whilst I await their arrival, attention has turned to the side walls of the building, upon each of which I’ve decided to make a point of interest in the form of entrances marked something like ‘Parcels’ and ‘Office’.

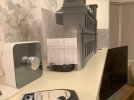
To that end, I’ve marked out a section of styrene sheet, of approximately the width of a wall, with the established dimensions:

IMG_2353.jpeg


Apologies for the clutter but we’re squeezed for space at present.

I’ll construct the doors and parapets/decorations from styrene strip and offcuts of styrene, basing them on the type that stood at the old Oxford Road station of the Liverpool and Manchester Railway, and which I’ll lay straight onto the drawn lines in the photo. This can then be attached on top of the main wall, with a section glued to the rear to prevent warping, as stocks are down to 0.75 and 1.0mm sheet at present.

Thanks for looking.

jonte
 
Top