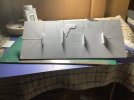
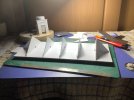
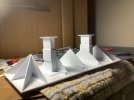
The main section of roof is now thankfully complete, a task that was delayed both by circumstances and the application of 3D printed ridge tiles:
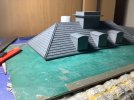
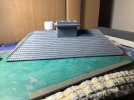
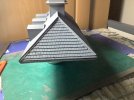
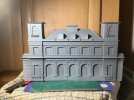
Incidentally, the wavy sections beneath the lower edges of the ridge tiles are an attempt at modelling addled mortar, which will become more apparent after painting.
The ridge tiles per se were excellent models in themselves, however, the material from which they were formed wasn’t exactly modeller friendly. Brittle to say the least, they were difficult to cut/shape without shattering and frequently broke into smaller sections or just bent upwards with even the lightest of sanding to remove the ‘pips’, ensuring they could only be glued in bits n bobs. And a pretty penny to boot, I’m not sure I’d use them again, preferring even my own homemade iterations to them.
I’ll leave the flashing until after I’ve painted the roof etc..
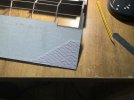
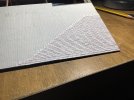
Elsewhere, the jury’s still out on how to model the chimney stack. This was a previous attempt using Howard Scenics (paper) embossed bricks:
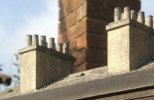
The subtle profile of the bricks, in contrast to some rather exaggerated embossed plasticard varieties and especially some laser cut kit offerings, is appealing. However, the best results are obtained by cutting a V groove to the rear to go round the corners of the skeleton chimney breast, which relies on the corners being true, lest you end up with rounded, unrealistic, edges (the left hand edge of the capping to the right hand chimney in the above photo as you look, is a prime example).
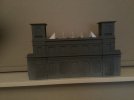
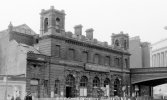
The chimney in this project appears okay, thus far, however as I’m to construct another two, the chances are I may not be so lucky. Thus, I’m leaning more to my original idea of representing a stone block version and shying away once more from Blackfriars with its brick built stacks. This picture of Cirencester is what I have in mind:
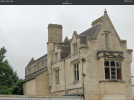
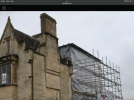
A base colour followed by masking prior to adding a top coat of a different hue, via masking tape, should pay dividends.
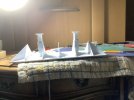
Tomorrow, I’m hoping to schedule in a visit to a distant model shop to stock up on styrene sheet, to address the sides and their rooves, as I’m totally out of materials. But before that, I need to address a more pressing matter with the build, that of the ‘leaning towers’ or turrets. This is the consequence of changing plan after starting the build. Originally designed to be removable along with the intended platform roof, when plans changed, I merely glued the top section into the available slot. Whilst as tight as a nut, it was only later I discovered the slight lean, and as much as I’ve tried to ignore it….well you know how it goes.
And now I realise at long last, that before I go any further, the time has eventually come to get down to brass tacks and deal with it, before access is lost after fitting the sides. After mulling over it for some time now, I reckon the only solution involves drastic action, involving the use of drills, nuts, bolts and washers, such is the force required to get the brute to yield. Once a satisfactory level is achieved, only then can supports be glued in place to provide a permanent fix.
And so, onward and upward; and outwards, it seems.
jonte





 . As one among many others who have shared similar experiences in modelling, my sympathies. Equally my admiration at your prompt action to rectify the situation. Your new-born grandson will no doubt be delighted with the result, as he grows to enjoy playing trains
  .
.