Brushs Laser Cutting and 3d Printing workbench

BrushType4

Western Thunderer
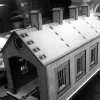
The eagle eyed lurkers on this thread have let me know the door within the main doors is on the wrong side. Easy fix for the kit but I’m going to leave as is here.
 

BrushType4

Western Thunderer
Bit more on the Engine Shed build.

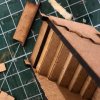
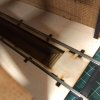
The pit is our standard pit road resized for the Engine Shed. So same construction sequence.

62270940_10156169844367256_6453976304055222272_n.jpg

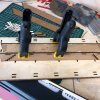
Glue the sides to the bottom piece. Use the shed base as a jig to keep all square.

62077702_10156169844412256_8938678231263870976_n.jpg 61682444_10156169844472256_2308374540247367680_n.jpg

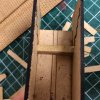
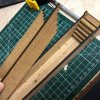
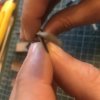
Carefully slide in each step through the sides and line them up in the slots.

62394493_10156169844557256_6450979220041498624_n.jpg 61726428_10156169844622256_810657669617549312_n.jpg 61747321_10156169844697256_8606435521343782912_n.jpg

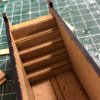
Add the top step.

61782233_10156169844727256_8156578035420626944_n.jpg 62175854_10156169844792256_2371596673592852480_n.jpg

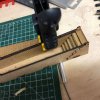
When glue had dried, fix the interior sides and clamp in until dry.
61987442_10156169844937256_5742343091176603648_n.jpg 62219351_10156169844962256_6832163271278067712_n.jpg

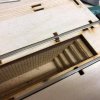
When complete, the complete unit is ready to be fixed to the shed.

62058396_10156169845042256_4732944137878241280_n.jpg 61905317_10156169845067256_7913796023942643712_n.jpg 62355645_10156169845132256_7752680509200662528_n.jpg 62055572_10156169845192256_4159407231806210048_n.jpg
 

BrushType4

Western Thunderer
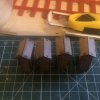
In readiness for fixing the slates, the chimneys are built up.

F9E5713B-3FFC-412C-BBDA-764550D322AB.jpeg

I used UHU glue for these as I wanted a quick grab and set.

The roof parts, need a mitred edge filed. Easy job.

A0F7E9D0-E8FA-40A1-9678-8E880FF55DDA.jpeg 56C3874A-A8EF-4568-BA4B-03415966AFD1.jpeg

Additional thin paper or plastic strips could be added to detail these up.

929C45A8-B1D1-421F-8FDA-3B8F094823FA.jpeg 2D6E49E1-1ECA-489E-B3EE-5776D8E1153E.jpeg

I’ll leave like this. The painting and finishing by the kit builder will take care of that.

E5F61355-A8F7-489B-9F55-1C5AEDC3709E.jpeg 48C5FEB7-4E86-45FE-84ED-81A0DB70F4BD.jpeg
 

Attachments

  • E22EE3F2-12AE-458C-8261-11BC9CD14AAE.jpeg
    E22EE3F2-12AE-458C-8261-11BC9CD14AAE.jpeg
    155.3 KB · Views: 1

BrushType4

Western Thunderer
In preparation for adding the slates, the soffit and barge boards need to be added first.

0C116454-B15C-4647-B1B2-A9ACE2EC6F01.jpeg

Also the base, being a key part of the construction, hasn’t had the assembly covered as yet.

1F5A2A44-8B65-4AD3-92EE-1A4EC8FE050E.jpeg

The laser cut chairs pushed into place and really don’t need any glue. The rail profile was kindly supplied by David Rayner from Off the Rails. Check out his shop on Shapeways. Off The Rails by drrayner - Shapeways Shops

CFC70DA4-D4B4-4679-AFA9-9B5543F0A504.jpeg 1339FB34-93C4-4005-B845-DDD2FE169AD2.jpeg

Glue the halves of the base together. Then slide the rails through the chairs. This holds the rail perfectly in place. Cosmetic chairs can be added if required.

26272503-B6A6-4C54-B183-23ACB3E42F2A.jpeg 34E70930-7177-44B9-B6C0-FEE3322541F3.jpeg

Next time, the doors will be fitted and hung. Hopefully slates too.

C0DEAA76-9168-493B-9FF4-01E7C9A59286.jpeg
 
Last edited:

LarryG

Western Thunderer
I am impressed with your sloping bricks 10 courses from the base. Didn't know they could be laser cut like this. Terrific looking buildings. I am well chuffed with this medium.
 

BrushType4

Western Thunderer
I am impressed with your sloping bricks 10 courses from the base. Didn't know they could be laser cut like this. Terrific looking buildings. I am well chuffed with this medium.
Yes, thank you. That’s what makes my kits unique. No one else does this in kit form. Though Tim Horn does on his built up models.
 
Last edited:

simond

Western Thunderer
I like the rail fixing method, looks to be very secure.

Yes, brilliant way of doing the chairs, secure, and self-jigging. I’m having a “D’OH” moment, that’s so much better than having to glue down C&L chairs on the pit edge. Too late now.

221C10C9-5168-4824-B684-7C5F34D501B7.jpeg

Presumably there’s a downside, you have to do 0MF, 0F and S7 versions.... :)

Atb
Simon
 
Last edited:

BrushType4

Western Thunderer
Before I forget, to join the waiting room already produced and delivered to the customer another signal box has recently passed through the workshop.

Waiting-Room.png
Here is St Kew Highway Signal Box in its raw state. having had a rough trial fit together, Several tweaks and adjustments later, a fresh set of parts have been produced and is now with the painting team.

IMG_2286.jpg IMG_2287.jpg

Come and see the final fully detailed and painted version at Telford.
 

BrushType4

Western Thunderer
Another project that is making headway is this one. This is the first 3D render for a series collaborative projects between myself and Nikki Wilkes. It is the shed at Kings Lynn in 7mm ready for final cad to 2D for laser cutting. It will encompass both Intentio's and Nikki's own systems and methods as a kit. The best of both thoughts in design for what we hope will produce leading edge kits for the discerning modeller.

Next in our project line up will be Peterborough Maintenance point and then we have some exciting plans for two and triple road sheds and much more.

66472111_1090473454478836_6868818798514798592_n.jpg 67099104_455048585293522_8734960880078290944_n.jpg
 
Last edited:

BrushType4

Western Thunderer
Having a play around to perfect engraving real stone work on our building kits and for a customer that demands realism. This small section took about 50 seconds to engrave.

IMG_2307.jpg

IMG_2306.jpg

For a project I'm after some good quality straight on images for stone work as used on Victoria and the Albert Ernest Bridges on the Severn. Any one in the area able to help please?
 
Last edited:
Top