Brushs Laser Cutting and 3d Printing workbench

BrushType4

Western Thunderer
So thanks to Chris Pencarrow, I've had to redo the bricks under the arch, but at least its correct now. The glued up version will remain as is!

Anyway its all bridges just now and I'm working on a GWR bridge. It has the added complication of curved courses above the arch. A real hump back bridge I expect.

Outline drawing so far.

Bridge.jpg
 
Last edited:

Pencarrow

Western Thunderer
Apologies... :bowdown:

If it's any consolation I've just scrapped and restarted the roof on one of my buildings. Somehow cut the asbestos sheeting too small. :headbang:
 
Last edited:

Pencarrow

Western Thunderer

BrushType4

Western Thunderer
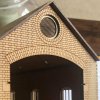
To complement the Intentio Shipston-On-Stour Weighbridge Hut kit, a batch of Shipston-On-Stour Engine Sheds kits are going through the workshop and will be ready in for dispatch in 4-6 weeks.

Some history around this building can be found Here

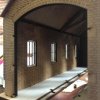
This is a particularly nice engine shed for me because of its distinctive use of red and blue bricks. I'll build one of these over the next coming weeks.

Shipston-On-Stour.jpeg

Edit.

I just wanted to add that this building is only possible due to the research and truly beautiful technical drawings (that are works of art) by the late A.Haynes.
 
Last edited:

BrushType4

Western Thunderer
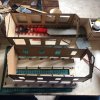
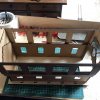
ok, parts have been cut and the test build of the Shipston-On-Stour shed begins...

The inside parts, laid out.
61192655_10156155103597256_3897369498960789504_n.jpg

Just use white PVA glue, no need for expensive stuff.

61852380_10156155103702256_7840287521232650240_n.jpg

Squeeze together. The parts are designed to be tight.

61339830_10156155103752256_2815029777499422720_n.jpg

Glue all sides

61384291_10156155103782256_2797176320004456448_n.jpg

Careful not to glue to base, the base can be used to help hold the parts square. Use elastic bands if you want to help pull the sides together tight.

61200950_10156155103892256_4977573096962654208_n.jpg

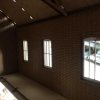
Now is a good time to paint the inside. I’m going to move to the next stage without painting.
 

BrushType4

Western Thunderer
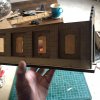
Exterior walls laid out.

61597373_10156155140927256_6292612256735690752_n.jpg

Again, use plenty of white glue along both sides of the toothed edge.

61849596_10156155141027256_7743613442396782592_n.jpg

Press together. This will be a tight fit and squeeze the glue out.

61244894_10156155141082256_4429142877485924352_n.jpg

Wipe away. I just use my finger.

61257207_10156155141097256_8550570254659485696_n.jpg

Once dry. Use a fine wet and dry to dress the join if required. This is important to make the corners perfect. If you miss this step, the toothed edge joins can be visible once painted.

61529789_10156155141212256_8877663105518141440_n.jpg
61188266_10156155141312256_623233117955555328_n.jpg

Complete all round and again, use the base as a jig being careful not to glue together.

61136095_10156155141167256_4630554213485641728_n.jpg

More soon.
 

BrushType4

Western Thunderer
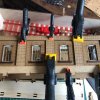
Today I’m building and fitting the windows.

61387194_10156160658142256_3301629098027122688_n.jpg

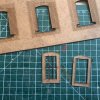
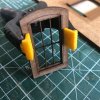
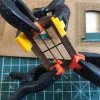
First off, using any PVA glue, fix the frames together and clamp to ensure all is square.

61831951_10156160658182256_8049878085576687616_n.jpg 61559201_10156160658252256_8586777481799794688_n.jpg

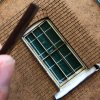
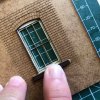
Then fix windows to the wall pieces. There are engraved lines to use as a guide but care still needs to be taken to ensure all lines up. By the way I’m using card windows due to not painting the model and wanting a little contrast.

61538249_10156160658282256_7003947184135602176_n.jpg

Then fix the sills. Normally, you’d paint these first. They are a press fit, but use glue as well to ensure nothing moves later.

61503636_10156160658322256_3980935148630704128_n.jpg 61417464_10156160658352256_3812844168913354752_n.jpg 61653053_10156160658412256_8880166195278381056_n.jpg

Do all round and then relax.

61474443_10156160658437256_4768259429160189952_n.jpg 61522414_10156160658477256_2333806802543575040_n.jpg

More soon.
 

BrushType4

Western Thunderer
Doh! I forgot to add tabs to the internal walls so they will need to be aligned by eye. Drawing updated.

61785996_10156160730777256_1121687390033805312_n.jpg 61642703_10156160730892256_247417427946635264_n.jpg 61361815_10156160730792256_855763901491445760_n.jpg

So using the base as a jig, slot in the inner and outer walls.

61667266_10156160730922256_8712539986857033728_n.jpg 61494084_10156160730992256_8173602426788511744_n.jpg 61646854_10156160731022256_959094200383569920_n.jpg

Then add glue to the outward facing side only and slide in the window wall. The kit will be tabbed to ensure line up but I’ve done this by eye here.

61472958_10156160731117256_1120870079232212992_n.jpg 61430882_10156160731192256_6638655435312201728_n.jpg 61856542_10156160731302256_9178257571528572928_n.jpg 61441628_10156160731367256_1935537719295868928_n.jpg

Checking all round, remove walls from base and it’s then good to clamp up until the glue dries.

61764475_10156160731457256_5457763596140281856_n.jpg
 

BrushType4

Western Thunderer
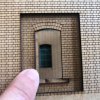
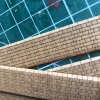
Adding a few details, the lower walling needs a a slight update on the brick spacing but I'll continue with test build and just change the drawing.

61620607_10156161094957256_7660444080769335296_n.jpg 61908490_10156161094977256_8911351308569542656_n.jpg 61404681_10156161095077256_5460989266903433216_n.jpg

Vent above doors.

61483809_10156161095117256_8524531714779774976_n.jpg

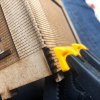
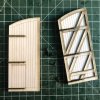
The laser cut door hinges are being fitted.

61821467_10156161215717256_6001869728442744832_n.jpg 61581624_10156161215782256_999470586637844480_n.jpg
61423841_10156161215872256_4466007625464545280_n.jpg

Next the long part of the hinge will be fitted to the doors.

61423841_10156161215872256_4466007625464545280_n.jpg 61376676_10156161215907256_8884880828123840512_n.jpg

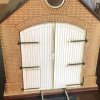
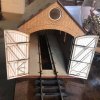
The doors dry fitted and hang closed and open. All is well so I’ll glue up with PVA. I will use a drop of superglue to fix the Romark hinge to the building and the doors.

61385885_10156161366047256_2536380644456398848_n.jpg 61429492_10156161366087256_2837786257990352896_n.jpg 61377440_10156161366162256_3183255616051216384_n.jpg
 

cbrailways

Western Thunderer
Excellent modelling. I'm thinking of having two side by side as a Goods Warehouse (with internal platform inbetween). What is the overall width and length please?
 
Top