7mm The Derby Line - Rolling Stock

dibateg

Western Thunderer
Adrian -
6 years of 'full time' loco building! I t was bought in for a project but I must have changed my mind on the motor.

Good question Dave - laziness! I do have some locos that have rigid axleboxes and few with a floating centre axle. I thought it would be interesting to see how this one performs with this configuration.

Regards
Tony
 

Dave Holt

Western Thunderer
That's a disarmingly honest answer, Tony.
I've got one loco with a fixed axle - a Fairburn 2-6-4. The front coupled axle is fixed and the others and rear bogie axles are fully compensated. The front truck axle is sprung. I have to say that, mainly, it runs and holds the road the same as my fully compensated or sprung locos. I suppose, if it met poorly laid track, it must buck and jerk about more than the floating locos but, hopefully, our layouts don't present assault-course track to test this out.
Dave.
 

dibateg

Western Thunderer
It was too cold to do anything outside, so I thought I'd make up the crank axle. The cranks were filed down from circular ones, and they really should be more of an oval shape for the J11. The eccentric sheaves are custom turned by a friend - easier to get working than the cast ones in the LG motion kit. All the flanges are drilled 0.75mm and pinned. That went well until I got to the 4th one and broke 3 drills off. So I drilled again and got most of the way through ( you can see the first hole ) and put a pin in the blind hole on each side...
IMG_0297.JPG

I had to thin down the the cranks to get the axle to fit in the frames. Here it is after being soldered up with solder paste and a blowtorch. I takes a little while to clean up the blackened item, but it came out ok.
IMG_0304.JPG

Next job is to fit the slidebars and support bracket and get all to line up.

On the hunt for J11 drawings , I found these which has been very useful:-
Railway Archive - Locomotive Plans

Parts so far:
Laurie Griffin inside motion kit
custom made eccentrics
 
Last edited:

dibateg

Western Thunderer
Despite some flu type bug ( and I've had a flu jab ) I managed a couple of hours at the workbench I'm using a thick rod to align the Griffin slide bars with the centre of the driving axle. I had to trim off the bottom corners of the slidebar plate to clear the spring hangers so that it would drop down fully in to it's slots.
IMG_0305.JPG

The drawings gave me the length of the connecting rods, so those have been made up:-
IMG_0308.JPG
 

dibateg

Western Thunderer
The kit comes with some etched non- working inside motion, so I have extracted the expansion links from the etch. They need a spigot that connects them to the drop link. On the real thing that must be some sort of forging or casting, but for simplicity ( and the lack of finding anything suitable ) I elected to drill the link 0.7mm to mount the wire. I didn't want to rely on a butt joint that could break later on. The balance weights are also from the kit.
IMG_0312.JPG

With low levels of light and the latest storm blowing in I've had to turn to the studio table. The rod will form the weighshaft and I'm trying to work out how make it so that it can come to pieces again. There needs to be a way of disconnecting between the upper and lower motion. I think I have a plan.... Red marks on the bearings are to ensure they go back in the same orientation.
IMG_0317.JPG
 

Podartist79

Western Thunderer
Stunning work Tony - as ever.
Fascinating that you’ve used a few pieces of the dummy motion from the kit as well.
Look forward to further progress!
Neil.
 

dibateg

Western Thunderer
Thanks Neil -

On with the superstructure, the running plate is quite straightforward, but those graceful little curves at the bottom of the spectacle plate took a bit more work. The splasher tops are full thickness and took a bit of forming, especially the flange on to the running plate. They could have done with being half etched really. I should have made my own ones. It might be me, but I've found myself trimming parts to fit - the bottom corners of the firebox for instance. The boiler also needed some trimming along the join as it was to large to fit around the formers. I formed the smokebox wrapper without annealing, I prefer to do that if I can. It folds too easily when annealed, and tarnishes, which makes it difficult to solder..
IMG_0362.JPG

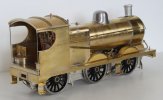
Well, it was really a case of one step forward and two back. Mainly down to me not checking squarness and position properly. I started to put the cab floor and platforms in, only to find one cab side was leaning out. So I had to torch the whole thing apart and start again. On the second attempt I hadn't noticed that the right cab side had slide forward in the locating slots and again only noticed after the final solder seam on the platforms. The front of the cab was noticibly skew-whiff. So it had to be torched apart for a second time. By this stage, the bin was looking like a suitable recipient for the various solder smeared parts. Anyway, I regrouped cleaned everything up and made a third attempt. Hence the somewhat messy interior of the cab... Everything has to be trimmed to fit and I had to create that cutout at the rear bottom of the side sheet to allow the handrail to go in to the running plate and be in line with the sheet. This was done by cutting the cab floor support development in to sections and soldering that in place first.
IMG_0366.JPG

In LNER days, J11s had a replacement smokeboxes with snap head rivets and what appears to be a pressed front plate. This has a rounded edge and is proud of the wrapper. Original smokeboxes were flush riveted with a sharp edge. I've tried to re-create that rounded edge on the front plate. The mud hole covers on the firebox are more flush fitting than having a domed cover, so I scratched those up. There is also an additional washout plug on the leading edge of the firebox. I couldn't understand why the boiler would not sit level, then discovered that the firebox wrapper needed trimming to lower it's height. the boiler needed trimming to, it would have overlapped at the join.
IMG_0392.JPG
 

dibateg

Western Thunderer
Yes I shouldn't moan really Heather, that is the nature of this kit...

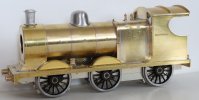
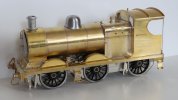
I've plonked it all together to see what it looks like, not bad. the lubricator came from the spares box. More commonly there were 8 outlets in two rows on the side, although they don't seem to have all been used. Four outlet per side were used on occasion and being lazy, that's what his one has. I couldn't think of a way of doing 8 outlets neatly ( that would have been a good challenge for DLOS ) .
IMG_0403.JPG

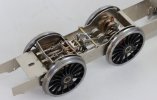
I've shoehorned in modified 4f valve gear, its all crammed in due to the frames being narrower than they should be of course.. The rockers should be longer to bring the slide valves over the top of the pistons. Again. someone with more skill than I would have worked out how to do that with some clever machining. Anyway, it fits, it works...
IMG_0414.JPG
 

dibateg

Western Thunderer
The frames are now detailed and just need cleaning up and the sandpipes added. the valve gear assemblies drop in to slots in the frames. The expansion link to rocker rod has the holes tapped 14BA and somehow I will get grub screws into those, that will engage in the slots in the expansion links. A length of brass bar with a washer soldered on the end passes through the weighshaft tube to engage it with the bearings. The main fiddle is getting the crank axle past the brake gear back in to the middle hornblocks.
IMG_0422.JPG
 

dibateg

Western Thunderer
I blame Mr Lambert for getting me in to the habit of fastidious cleaning up Heather! There are some solder smears to tidy up, especially on the inside of the frames...

So it's plonked together for the photos, all the major white metal components are loose. Its nearly there, some tidying and minor filling and those odd details that you always pick up later. For instance the injector drains that poke out from under the cab steps.
IMG_0432.JPGIMG_0434.JPG


On to the tender then...
 

7mmMick

Western Thunderer
Hi Tony,

Just catching up here. I do love the J11’s and to be honest most pre nationalisation LNER 0-6-0! I really like the attention to detail around the later smoke box additions and of course the inside motion. Very glad you stuck with the cab issues, sounds like a nightmare :)):thumbs: Looking forward to seeing her in paint,
Mick
 

dibateg

Western Thunderer
Thanks Mick -

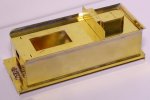
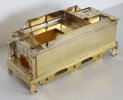
Overnight I was mulling over the brake cross beams on the tender frames and the wire sits underneath the beam in a half etch. I decided I didn't like the appearance of the wire 'sitting' on the etch. So stripped the brake gear and use a junior hacksaw to cut out the slot, which will then take a piece of 0.7mm brass wire nicely. It looks a lot neater. Now I'm looking back at the loco, which is still as kit designed...
IMG_0445.JPG

I scratched up an adjuster section and cut the ends off the etching to fit into slots cut in 1.6mm brass rod, drilled out nuts finish the job.. The pull rods should really have proper clevises at the brake beams, a double etching would have made that easy...
IMG_0455.JPG


The body plonked together. Getting that flare angle right is always interesting..
 

Attachments

  • IMG_0453.JPG
    IMG_0453.JPG
    133.3 KB · Views: 18

Scale7JB

Western Thunderer
Thanks Mick -

Overnight I was mulling over the brake cross beams on the tender frames and the wire sits underneath the beam in a half etch. I decided I didn't like the appearance of the wire 'sitting' on the etch. So stripped the brake gear and use a junior hacksaw to cut out the slot, which will then take a piece of 0.7mm brass wire nicely. It looks a lot neater. Now I'm looking back at the loco, which is still as kit designed...
View attachment 155154

I scratched up an adjuster section and cut the ends off the etching to fit into slots cut in 1.6mm brass rod, drilled out nuts finish the job.. The pull rods should really have proper clevises at the brake beams, a double etching would have made that easy...
View attachment 155156


The body plonked together. Getting that flare angle right is always interesting..
Little things make the biggest difference..

JB.
 

dibateg

Western Thunderer
I've been wading through the minefield of GCR tenders, which we all thought at one time were the same. There has been a discussion on Wright Wrights on RMweb regarding this... All three of my GCR locos have different arrangements on the tender top...

Andrew from Oz sent me this on Tony's thread:-
4000 gallon is right for 64397 (previously 5282) from 4/49-5/60. During that period it had tender 5004 which was originally coupled to B8 5004. The tender outlived the J11 and spent its last 12months plus attached to an O4. Source Yeadon Appendix 2 which covers in detail the GC tender allocations.

There are people always willing to help.

There is some more cleaning up to do and final details to add, but it is nearly there. This tender features a lower rear coal plate. Some were higher.
IMG_0463.JPG
 

Dog Star

Western Thunderer
I've been wading through the minefield of GCR tenders, which we all thought at one time were the same. There has been a discussion on Wright Wrights on RMweb regarding this... All three of my GCR locos have different arrangements on the tender top...
Given the large number of pages for the RMWeb topic, please give me a pointer to where to find the discussion about GCR tenders for the Class 9J.

thank you, Graham
 

dibateg

Western Thunderer
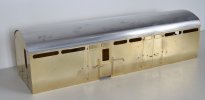
Whilst the J11 awaits a few final parts, I've been digging through some kits in the cupboard. This CRT Thompson BZ has been in there for years and I've already had a look once and put it back. The sides are etched to depict hinges on the guards door, but that opens inward, so they were filled in with segments of brass wire. The slot was recut with a razor saw.
IMG_0544.JPG

The roof took a bit of fitting and filing - I find aluminum the most unpleasant material to work with. The kit comes with and aluminium floor. I shall ditch that and scratch up a brass underframe. I can solder things to that...
I fitted the end only to find that they left a horrible gap at the top. I could not think of any way off filling that neatly.
IMG_0550.JPG

So by chance I remembered that I had some spare Sidelines etchings ( after I completely cocked up a set of sides ) which included two ends which have a much better roof profile. All I needed to do was to cut out a new end window.
IMG_0552.JPG

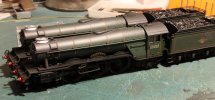
The BZ is also sharing the bench with some reluctant commission work. Converting single to double chimneys on these Hornby A3's. I looked for some information on RMweb as to how to get the single chimney off:- ' grip it with a pair of pliers and twist off'! No no no! I just inserted the shank of the largest drill that would fit and gently rocked it and the chimney clicked off.. The double chimney is not a straight swap for the single - it is mounted slightly further back, so some gentle hole enlarging was required. They are lovely models but it is strange going back to 4mm scale!
IMG_0548.JPG
 
Last edited:
Top