7mm The Derby Line - Rolling Stock

dibateg

Western Thunderer
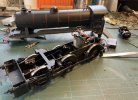
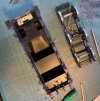
I bought 61738 second had a while back and after some tidying up has been a reliable performer on the Nottingham - Basford local service. As always after a running session, there are few locos to attend to and I'd noticed a clicking sound when the loco was running in reverse.
On examination, there was a catalogue of issues! Tender drawbar nut detached, a loose middle driving wheel, a delaminated coupling rod, one return crank loose and a loose cylinder wrapper... The original build was tidy, but the builder was very sparing with the solder.

Soldering a nut to a suface with no hole behind it is always going to fail, as when the screw is tightened it with just pull the nut off. So I made a bracket to retain it. The coupling rod only appeared to be soldered at the ends!

Anyway, all back together and ready for the next session.
IMG_1740.JPGIMG_1741.JPG
 

dibateg

Western Thunderer
I've not had much time to get on with the L1, but with a streaming cold had a third go at the smokebox saddle.. it was too high, too wide, so after a lot of filing...
IMG_1758.JPGIMG_1759.JPG


With that resolved I could get on with getting the boiler to fit nad it sort of looks like this:-
IMG_7917.JPG
 
Last edited:

dibateg

Western Thunderer
It's slow going with this build.
The drawing Mick kindly sent me shows an additional locker at the side of the main one ( or are they coal doors? ). So I scratched that up. I found some useful hinges on an old MOK fret, so they came in handy. My late mother's brass lacemaking pins make good handles.
IMG_1761.JPG

The rear bulkhead slots in, I'm not if thats a useful feature...
IMG_1762.JPG

The roof is full thickness 18thou etch, I made a new one up from some 10thou brass. It's much easier to roll to shape. Now I think the feed pipes to the oiler in the cut out are too large. Boiler bands are on, but the one at the spectacle plate needs re- doing. Two steps back again...
IMG_1763.JPG
 

Dave Holt

Western Thunderer
Coming along nicely, Tony.
If your door handles are right on the centre "cupboard", then that is what it is. If they were coal doors into the bunker, they would have substantial hingers locking bars to resist the weight of coal.
Real oil pipes are 3/8" or 1/2" O/D, max. Whatever that scales in 7 mm.
Dave.
 

dibateg

Western Thunderer
Thank chaps, I used 0.5 copper, interestingly, I dug the the wire box and found some 0.3 brass wire, I think that’s close enough! I have no copper that size…
 

45609

Active Member
5 amp fuse wire is about 0.2 mm copper.
Dave.
Well done Dave for specifying the units being used. Kind of essential but no offence implied to the previous posters. For clarity,

In 7mm scale

3/8" = 0.219mm
1/2" = 0.292mm

In 4mm scale

3/8" = 0.125mm
1/2" = 0.167mm

I'm working mostly in 4mm scale and use fine copper conductor wire stripped from 13 amp flex. This wire measures out at 0.18mm to 0.19mm typically. Still overscale but using anything of smaller diameter is lunacy IMHO.

All the best...Morgan
 
Last edited:
  • Like
Reactions: AJC

Ian@StEnochs

Western Thunderer
Thank chaps, I used 0.5 copper, interestingly, I dug the the wire box and found some 0.3 brass wire, I think that’s close enough! I have no copper that size…

A good source of thin copper wire is offcuts of electrical cables, the more flexible ones tend to be thinnest but even lighting flex is pretty good. Just check skips outside house renovations for a ready source, ask first though, this bit will pipe up loads of lubricators, 0.1mm wire.

7F6516F0-BC6E-45A1-8A32-2CCF68995C4B.jpeg
 

dibateg

Western Thunderer
Thanks Ian -
yes, I have a box full of them - I trained as an electrician at one point. Fortunately, a more attractive opportunity came along. I have every size you can think of, apart from anything between 0.2 and 0.5mm....

Regards
Tony
 

dibateg

Western Thunderer
O4 63859 passes through Basford North on a running in turn. There were plenty of things to fix: - wonky front buffer, loose pick up connections, motor not able to move freely and epoxy from the balence weights catching the pick up housing on the inside of one of the wheels. This was causing it to hesitate and click in back gear... took ages to find!
IMG_1853.JPG
 

dibateg

Western Thunderer
A little more on the L1 - Tank tops in and Finney7 washout covers on the firebox. I replaced the feed pipes in to the running plate lubricator with 0.3mm brass wire.. I've also removed the cradle from the valence.
IMG_7921.JPG

A casualty of the last running session, I knocked the plastic step off the cab end of D8051. Ready to run stuff is great, but some of the plastic detail can be flimsy. So I made some new steps from Nickle silver strip. Drilled out some mounting holes and glued it in. The pale spot is from the camera lens ( again! ) I've cleaned it since...
IMG_7919.JPG

Latest addition to the fleet is an Ellis Clark Black 5 - an indulgence really, A lovely model, but also has fragile plastic detail. When I build a loco from a kit, the detail is always metal and soldered in place. So they are robust and resist clumsy handling. With RTR stuff, one has to handle the model with much more care. It's just about learning how to handle an individual model. First thing to go was the rear glazed cab windows. I don't think I've ever seen a photo of one in service with them both closed. Not so easy as you'd think as the windows are moulded in one piece.. Anyway - achieved with a bit of ham fisted brute force... I did manage to knock loose the top end of the cab entrace handrail - now glued back.

IMG_7918.JPG
 

Dave Holt

Western Thunderer
Those tanks really were chunky looking locos, weren't they? I must have seen quite a few around Guide Bridge but don't have any clear memories of them. Looking at my very first Ian Allan ABC book, Eastern Region, Winter 1953/4, I apparently saw three examples - 69802, 26 & 29.
Lovely looking model, Tony.
Dave.
 
Last edited:

LarryG

Western Thunderer
Everything about the GCR was chunky. I saw one close-up in 1959. Like the NER A8's, they were soooo different from the 1930s and 40s tank engines that flitted around on suburban workings. I have a very loose excuse for running one, but I wouldn't be able to live with myself...:D:))
 

dibateg

Western Thunderer
Thanks chaps -
Yes, the A5 is a very distinctive machine, totally unlike the later big tanks that came along. It certainly has character...

Regards
Tony
 

dibateg

Western Thunderer
Some good weather at last means that outside work takes priority after what seems like nine months of continous rain here, but I did find an hour to tackle the piston rods for the L1. The cast rods were lumpy, so I couldn't see an easy way of cleaning them up. So I cut them off and drilled the crossheads. I couldn't find any 1.8mm nickel silver rod ( I only had a 30mm length left ) in my stores or on line, so went for 1.6mm. The wooden stirrer is to stop the crosshead rotating whilst it's being drilled. I've yet to work out how to make a retainer to go behind the slidebar....
IMG_1922.JPG
IMG_1924.JPG
 

mickoo

Western Thunderer
I tend to do this most of the time now, smoothing cast rods is just a time consuming mare.

It's too late now but 2.0 mm would have been the correct diameter ;)
 

dibateg

Western Thunderer
I looked at 2mm Mick - but it seemed a bit oversize.. 1.8 would have been a good compromise... They are not fixed in yet...

Thanks for the observation though..
 

mickoo

Western Thunderer
Real engines are 3½" diameter (if it's the same as the B1) and I'm 95%+ sure they are as 3½" shafts have a waisted section just ahead of the crosshead and as far as I've determined 3" - 3¼" are constant diameter, K1, K3 etc.

But it could be smaller due to the smaller driving wheels so 1.8 to 2.0 is the ball park area.

I'll be pulling some more drawings in a few weeks hopefully and wil see if there's a motion one for the L1, I've a distant niggle there isn't.
 
Top